Welcome to the Isuzu D-Max Owner’s Manual, your essential guide to understanding and maintaining your vehicle. This manual provides detailed information on features, maintenance, and safety to ensure optimal performance and longevity of your Isuzu D-Max.
Purpose and Structure of the Manual
The Isuzu D-Max Owner’s Manual is designed to provide owners with a comprehensive understanding of their vehicle. Its purpose is to guide you through proper operation, maintenance, and troubleshooting. The manual is structured into clear sections, starting with an introduction, followed by vehicle overview, maintenance schedules, engine performance, safety features, and common issue solutions. Each section is organized to ensure easy navigation and quick access to essential information. Detailed instructions, specifications, and safety tips are included to help you maximize your vehicle’s potential and ensure longevity. This manual serves as your go-to reference for all aspects of D-Max ownership.
Important Safety Information
Reading and understanding the Isuzu D-Max Owner’s Manual is crucial for safe and proper vehicle operation. Always follow the recommended maintenance schedules and guidelines to ensure your vehicle operates efficiently. Be aware of potential hazards, such as overheating or fluid leaks, and address them promptly. Never modify your vehicle without consulting the manual or an authorized Isuzu Dealer, as this could compromise safety. Familiarize yourself with safety features and emergency procedures, such as proper braking techniques and towing guidelines. For specific concerns, refer to the manual or contact your Isuzu Dealer for professional advice. Safety should always be your top priority when driving or maintaining your D-Max.

Vehicle Overview
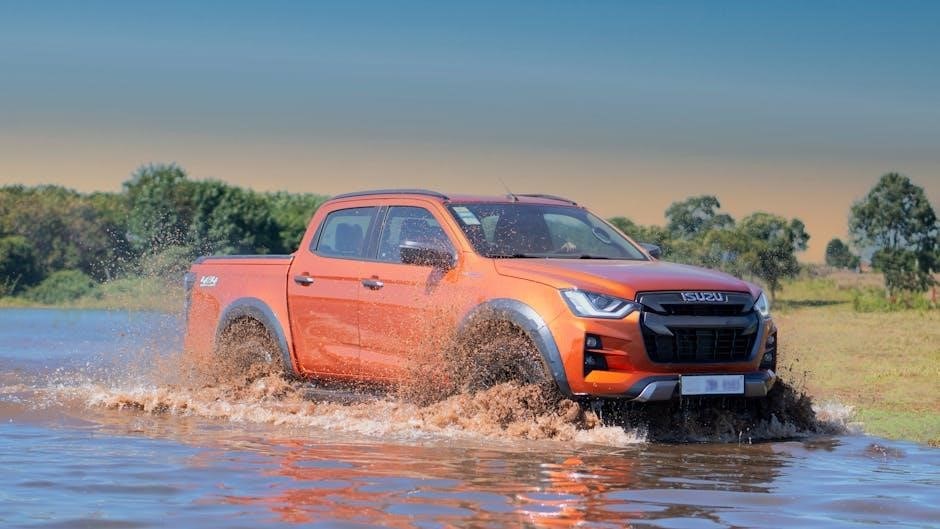
The Isuzu D-Max is a robust and versatile pickup truck, designed for both on-road comfort and off-road durability. It combines advanced technology with practical design elements to deliver exceptional performance and reliability.
Design Features and Capabilities
The Isuzu D-Max boasts a rugged yet modern design, blending practicality with sophistication. Its exterior features include a bold front grille, aerodynamic lines, and durable materials to withstand harsh conditions. Inside, the cabin offers premium finishes, ergonomic seating, and advanced technology like touchscreen infotainment systems. The vehicle is equipped with a robust 4×4 system, high ground clearance, and a strong chassis for exceptional off-road performance. Additionally, the D-Max is designed with a spacious cargo bed and versatile towing capabilities, making it ideal for both work and leisure. Its lightweight yet strong construction enhances fuel efficiency and handling, ensuring a smooth driving experience across various terrains.
Available Models and Configurations
The Isuzu D-Max is offered in a range of models to cater to diverse needs. These include the base model, mid-level trims, and high-end variants, each with unique features. Engine options vary, with a focus on powerful turbo-diesel units, paired with manual or automatic transmissions. Drivetrain choices include rear-wheel drive (RWD) and four-wheel drive (4WD) configurations for enhanced versatility. The D-Max also comes in different cabin styles, such as single cab, extended cab, and double cab, offering varying levels of passenger and cargo space. Additionally, optional packages like premium interior trim, advanced infotainment systems, and off-road suspension upgrades are available, ensuring customization to suit individual preferences and requirements.
Maintenance Schedule
The Isuzu D-Max maintenance schedule outlines essential service intervals and checks to ensure optimal performance. Regular maintenance is crucial for longevity and reliability, as detailed in the manual.
Routine Service Intervals
The Isuzu D-Max owner’s manual recommends regular service intervals to maintain performance and durability. Typically, routine maintenance is required every 5,000 to 10,000 miles, depending on driving conditions. Key checks include oil and filter changes, tire pressure inspections, and fluid level monitoring. The manual also specifies intervals for replacing the air filter, timing belt, and spark plugs. For vehicles used in extreme conditions, such as frequent towing or off-road driving, more frequent servicing is advised. Always consult the manual or an authorized Isuzu dealer for precise schedules tailored to your vehicle’s usage. Adhering to these intervals ensures optimal engine performance, reduces wear, and extends the lifespan of your D-Max.
Common Maintenance Tasks
Regular maintenance is crucial for the longevity and performance of your Isuzu D-Max. Common tasks include oil and filter changes every 5,000 to 7,500 miles, depending on usage. Tire pressure checks and rotations should be performed every 6,000 miles to ensure even wear. Fluid levels, including coolant, brake, and transmission fluids, should be inspected monthly. The air filter should be replaced every 15,000 miles or sooner if driving in dusty conditions. Additionally, the timing chain and drive gears should be inspected and lubricated as specified. Checking the radiator cap and coolant system regularly can prevent overheating issues. Always consult the manual for detailed instructions.
Engine and Performance
The Isuzu D-Max features a robust 3.0-liter turbo-diesel engine, model 4JJ3TCX, offering enhanced refinement and reduced noise compared to previous versions. This engine delivers improved fuel efficiency and superior performance, ensuring a smoother and more powerful driving experience.
Engine Specifications
The Isuzu D-Max is equipped with a powerful and efficient 3.0-liter turbo-diesel engine, model 4JJ3TCX. This engine delivers a maximum power output of 188 horsepower and a torque of 332 Nm, ensuring robust performance for both on-road and off-road driving. The engine features a 4-cylinder inline configuration with a displacement of 2,999 cc, providing excellent fuel efficiency and reduced emissions. Equipped with a common-rail fuel injection system and a variable geometry turbocharger, the engine offers smooth acceleration and consistent power delivery. The D-Max also meets stringent emissions standards, making it an environmentally friendly choice while maintaining its legendary durability and reliability.
Optimizing Fuel Efficiency
To maximize fuel efficiency in your Isuzu D-Max, adopt a smooth driving style with consistent speeds, avoiding sudden acceleration or hard braking. Regular maintenance, such as engine tune-ups and air filter checks, ensures optimal performance. Maintain the recommended tire pressure, as under-inflated tires can reduce fuel efficiency. Use the correct grade of diesel fuel and consider the Eco-mode for improved mileage in city driving. Avoid idling for extended periods and remove unnecessary weight from the vehicle. By following these tips, you can enhance your D-Max’s fuel economy and enjoy lower operating costs while maintaining its powerful performance capabilities.

Safety Features
The Isuzu D-Max is equipped with advanced passive and active safety features to ensure protection and control. These technologies enhance driver confidence and vehicle stability under various driving conditions.
Passive Safety Features
The Isuzu D-Max incorporates advanced passive safety features designed to protect occupants in the event of a collision. A high-strength steel body and frame provide exceptional rigidity and collision protection. Dual front airbags and side curtain airbags deploy to cushion occupants and reduce injury risk. Three-point seatbelts with pretensioners and load limiters are fitted for all seats, ensuring occupants are securely restrained. Anti-submarining features prevent occupants from sliding under the seatbelts during sudden stops. Crumple zones absorb and distribute impact forces, minimizing damage to the passenger compartment. These features work together to create a safe and secure environment, earning the Isuzu D-Max a five-star safety rating in rigorous testing.
Active Safety Technologies
The Isuzu D-Max is equipped with cutting-edge active safety technologies to enhance driver control and prevent accidents. The Electronic Stability Control (ESC) system monitors and adjusts engine power and braking to maintain traction. Hill Descent Control (HDC) assists in steep descents by controlling speed and braking. The Anti-lock Braking System (ABS) prevents wheel lock-up, ensuring stable braking on various surfaces. Trailer Sway Control (TSC) stabilizes towing by applying selective braking and reducing engine torque. These technologies work seamlessly to improve handling, stability, and safety, giving drivers confidence on both on-road and off-road terrains. They are integral to the Isuzu D-Max’s reputation for reliability and advanced safety.

Troubleshooting Common Issues
Identify and address common problems like coolant leaks, warning lights, or unusual noises. Regular checks and timely repairs prevent major issues. Always consult your manual for guidance.
Identifying and Diagnosing Problems
Identifying issues early ensures your Isuzu D-Max runs smoothly. Start by observing unusual symptoms like warning lights, noises, or leaks. Consult the manual to understand dashboard indicators and common issues. For coolant leaks, check the radiator and hoses. If warning lights appear, refer to the manual’s diagnostic guide. Strange noises may indicate loose parts or worn components. Regular inspections can prevent major repairs. If unsure, contact an Isuzu specialist for professional advice. Timely action avoids costly damage and keeps your vehicle reliable. Always follow the manual’s troubleshooting steps for accurate diagnosis and safe repairs.
Practical Solutions for Owners
Regular servicing and proactive maintenance are key to extending your Isuzu D-Max’s lifespan. Always check coolant levels before long trips to prevent overheating. For oil changes, use Isuzu-recommended grades to ensure engine health. If warning lights appear, consult the manual or visit a certified technician. Address minor issues promptly, like loose belts or worn brakes, to avoid costly repairs. Keep the owner’s manual handy for quick reference. For parts replacement, opt for genuine Isuzu components to maintain performance and reliability. Stay informed about common issues and solutions to keep your D-Max running smoothly and safely on the road.