Letter carving is an ancient craft involving the cutting of letters into stone, wood, or other materials․ It combines creativity with precision, offering a timeless way to preserve history and express artistry․ This traditional technique has evolved into a modern artistic expression, blending historical significance with contemporary design․
Historical Background of Letter Carving
Letter carving traces its origins to ancient civilizations, where inscriptions on stone, wood, and metal served as records of history and cultural identity․ Early examples include Egyptian hieroglyphs, Greek inscriptions, and Roman monumental lettering․ The craft evolved through the Middle Ages, with intricate carvings in cathedrals and memorials․ The Renaissance revived classical lettering styles, influencing modern techniques․ This timeless art form has preserved history and continues to inspire artists, blending tradition with contemporary creativity․ Its enduring appeal lies in its ability to communicate stories across generations․
Modern Applications of Letter Carving
Letter carving remains a vibrant art form in contemporary times, with applications in public memorials, architectural features, and artistic installations․ Modern artisans often blend traditional techniques with new materials and tools, creating intricate designs that honor historical roots while embracing innovation․ The craft is also used in restoring heritage sites, preserving cultural legacy․ Additionally, digital tools now aid in designing carvings, allowing for precise planning before physical execution․ This evolution ensures letter carving continues to thrive, adapting to modern tastes and technologies․
Essential Tools for Letter Carving
Letter carving requires a range of tools, including chisels, gouges, mallets, and power tools, each designed for precision and control in shaping letters into various materials․
Hand Tools for Carving
Hand tools are indispensable for letter carving, offering precision and control․ Essential tools include flat chisels for outlining, gouges for curved letters, and mallets for striking․ Sharpening tools, like whetstones, maintain edge quality․ Stencils and pencils aid in design transfer․ High-quality steel tools are preferred for durability․ Beginners should start with basic sets, gradually expanding as skills improve․ Proper tool maintenance ensures longevity and consistent results․ Practice on softer materials, like soapstone, to refine techniques before moving to harder surfaces․ Safety is paramount, as sharp tools require careful handling to avoid accidents․
Power Tools for Precision Carving
Power tools enhance efficiency in letter carving, enabling precise and intricate designs․ Rotary tools, such as Dremels, are ideal for detailed work, while angle grinders handle larger areas․ Sanders smooth surfaces and refine edges․ Pneumatic tools, like air chisels, offer controlled carving․ Laser engravers are modern alternatives for high accuracy․ These tools complement hand techniques, allowing artists to achieve complex letterforms and textures․ Proper safety gear is essential when using power tools․ Combining traditional methods with modern technology ensures versatility in creating stunning lettering․
Techniques in Letter Carving
Letter carving combines artistic skill and precision, blending traditional craftsmanship with creative expression․ Techniques involve careful design, accurate cutting, and attention to detail, ensuring timeless beauty․
Relief Carving Techniques
Relief carving is a foundational technique in letter carving, involving cutting letters into a material’s surface to create a raised design․ This method requires meticulous planning and precise toolwork to achieve depth and detail․ Artists often use chisels and gouges to remove surrounding material, leaving the letters prominent․ Proper spacing and alignment are crucial for visual appeal․ Relief carving is particularly effective for monumental lettering, where durability and readability are essential․ It blends artistic expression with technical skill, making it a cornerstone of letter carving traditions․
Engraving Techniques for Lettering
Engraving techniques involve cutting letters directly into a material’s surface, creating precise, indented designs․ This method requires great control and often uses tools like burins or gravers․ Proper letter spacing, alignment, and depth are critical for readability and aesthetics․ Guidelines or stencils can aid accuracy․ Engraving is ideal for detailed work and is commonly used on metal, stone, and wood․ Practice and patience are essential to master this technique, which adds elegance and permanence to lettering in various artistic and functional applications․
Applications of Letter Carving in Art
Letter carving enhances artistic expression through intricate designs in sculpture, decorative arts, and public installations․ It bridges tradition and modern creativity, adding depth and meaning to spaces․
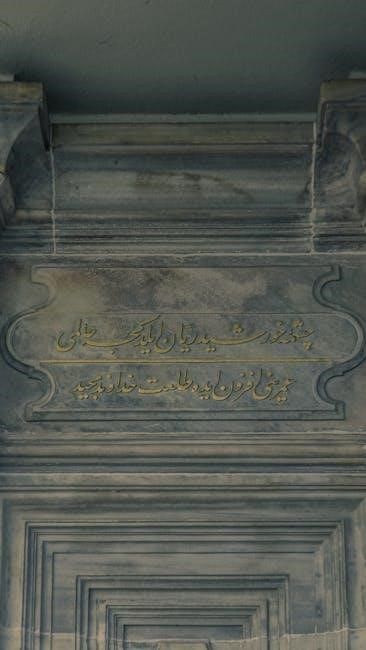
Monumental Lettering
Monumental lettering is a revered form of letter carving, often used in memorials, statues, and public spaces․ It involves creating large, durable inscriptions that withstand time and weather․ This technique requires precise craftsmanship and an understanding of material durability․ Monumental lettering is not only functional but also serves as a lasting tribute to historical events and figures․ Its grandeur and permanence make it a cornerstone of artistic expression in public domains, blending history with aesthetic appeal․
Decorative Arts and Letter Carving
Letter carving plays a significant role in decorative arts, enhancing objects like furniture, plaques, and architectural features․ It adds elegance and meaning to designs, blending functionality with artistic expression․ Skilled artisans use various materials, such as wood, metal, and stone, to create intricate lettering that complements overall aesthetics․ This technique is often used in interior design to personalize spaces, making it a cherished element in both traditional and contemporary decorative art forms․
Best Practices for Beginners
Start with soft materials like wood or linoleum․ Practice basic letterforms and spacing․ Be patient and seek guidance from experienced carvers or detailed tutorials․
Choosing the Right Materials
For letter carving, select materials that suit your skill level and project goals․ Beginners often start with wood like cherry or walnut, as it is soft yet durable․ Stone, such as limestone or sandstone, is ideal for long-lasting pieces but requires more advanced tools․ Linoleum is another popular choice, offering a soft, forgiving surface for practice․ Always ensure materials are dry and free of cracks to achieve smooth, precise carvings․ Proper material selection enhances both the process and the final result of your letter carving art․
Common Mistakes to Avoid
When starting with letter carving, avoid using dull tools, as they can cause uneven cuts and damage materials․ Incorrect spacing between letters is another common error, disrupting the visual flow․ Applying too much pressure, especially on delicate materials like stone, can lead to cracks․ Neglecting to sketch a design beforehand often results in misalignment․ Lastly, rushing the process can compromise precision and quality․ Practicing on scrap material first helps refine techniques and prevents costly mistakes․
Digital Resources for Learning Letter Carving
Discover comprehensive PDF guides and online courses offering step-by-step tutorials and expert techniques for mastering letter carving․ These resources provide invaluable insights for both beginners and seasoned artisans․
PDF Guides and Tutorials
PDF guides and tutorials on letter carving provide comprehensive step-by-step instructions, detailed illustrations, and expert tips․ They cover essential techniques, tool selection, and material preparation․ These resources are ideal for both beginners and experienced artisans, offering a structured approach to mastering letter carving․ Many guides focus on specific styles, such as classical inscriptions or modern minimalist designs․ They often include practical exercises to enhance precision and creativity․ With downloadable accessibility, PDFs are a convenient way to learn and refine letter carving skills at your own pace․
Online Courses and Workshops
Online courses and workshops offer interactive learning experiences for mastering letter carving․ Many platforms provide structured lessons, video tutorials, and hands-on projects․ These courses cater to all skill levels, from beginners to advanced artisans․ They often include live Q&A sessions with instructors and access to exclusive resources․ Workshops focus on practical skills, such as tool handling and design principles․ Participants can learn at their own pace, with flexible scheduling options․ These digital classrooms are an excellent way to gain expertise in letter carving while connecting with a global community of artists and enthusiasts․
The Relevance of Letter Carving in the Digital Age
Letter carving remains a cherished art form, bridging tradition and modernity․ Its tactile, human touch offers a unique counterpoint to digital design, preserving cultural heritage while inspiring innovation in creative fields․
Combining Traditional and Digital Techniques
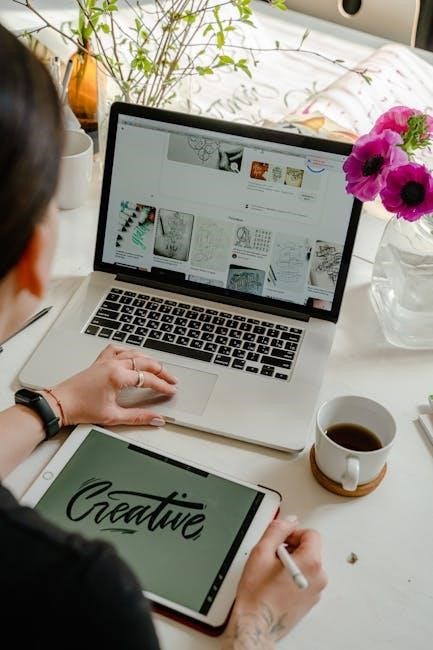
Modern letter carving often merges traditional craftsmanship with digital tools․ Design software enables precise lettering layouts, while CNC machines or lasers aid in cutting intricate patterns․ This fusion allows artists to achieve high accuracy and creativity, blending classic techniques with contemporary efficiency․ Digital tools also provide new ways to visualize and edit designs before carving, ensuring flawless execution․ However, the human touch remains essential, as hand-carved details add uniqueness and character to the final piece, preserving the art form’s soul in a tech-driven world․
The Future of Letter Carving
Letter carving is evolving, embracing both tradition and innovation․ Advanced digital tools, like 3D printing and laser engraving, are transforming the craft, offering precision and scalability․ Sustainable materials are gaining prominence, aligning with eco-conscious values․ Despite technological advancements, the essence of handcrafted artistry remains vital, ensuring a balance between modern techniques and timeless beauty․ The future of letter carving lies in this harmony, blending heritage with cutting-edge methods to create enduring works of art that resonate across generations․