The GE JES1109RRSS is a versatile countertop microwave oven designed for efficient cooking, reheating, and defrosting. With a 1.1 cubic foot capacity and 800 watts of power, it offers advanced features like convection cooking and air frying. Its compact design and user-friendly touch-pad controls make it perfect for modern kitchens, providing convenient cooking solutions while saving space.
Overview of the GE JES1109RRSS Model
The GE JES1109RRSS is a 1.0 cu. ft. countertop convection microwave oven with air fry capabilities. Designed for versatility, it offers 800 watts of power and multiple cooking modes, including convection cooking, air frying, and traditional microwave functions. Its compact design makes it ideal for small kitchens or limited counter space. The oven features an electronic touch-pad control for easy operation and includes a kitchen timer for added convenience. This model is perfect for households seeking a space-saving, multi-functional cooking solution.
Key Features and Capabilities
The GE JES1109RRSS microwave features a 1.0 cu. ft. capacity, 800 watts of power, and multiple cooking modes. It includes convection cooking for crispy results, air frying for healthier meals, and traditional microwave functions. The touch-pad controls allow easy selection of cooking modes, time, and power levels. Additional features include a kitchen timer, defrosting options, and preset settings for common foods. This model is designed for convenience, offering versatile cooking solutions in a compact, space-saving design.

Installation and Setup
For proper installation, unpack the microwave and place it on a flat, stable surface. Ensure adequate ventilation and follow manual guidelines for leveling and positioning.
Unpacking and Placement Guidelines
When unpacking the GE JES1109RRSS, carefully inspect the microwave for any damage. Place it on a flat, stable surface, avoiding direct sunlight and moisture. Ensure there is at least 3 inches of clearance on all sides for proper ventilation. The microwave should not be installed near flammable materials or in areas prone to high humidity. Follow the manual’s guidelines for optimal placement to ensure safe and efficient operation. Its compact design makes it ideal for small kitchens or limited counter space.
Leveling and Ventilation Requirements
Proper leveling is essential for the GE JES1109RRSS to ensure even cooking and prevent damage. Place the microwave on a sturdy, flat surface and adjust the feet as needed. Maintain at least 3 inches of clearance on all sides for adequate ventilation. Avoid installing near flammable materials or in humid environments. Ensure the area is well-ventilated to prevent overheating. Follow the manual’s leveling guide for optimal performance and safety. Proper ventilation ensures efficient operation and extends the appliance’s lifespan.

Safety Precautions and Information
Always read the manual before use to ensure safe operation. Keep children away and avoid overheating food. Use microwave-safe containers and avoid metal utensils. The child safety lock prevents accidental start. Follow all warnings to prevent burns or fires. Proper usage ensures safe and efficient cooking. Adhere to guidelines to maintain appliance longevity and user safety.
Important Safety Tips for Operation
Always read the manual before using the GE JES1109RRSS microwave. Ensure children are supervised and keep a safe distance. Use only microwave-safe containers and utensils, avoiding metal. Never overheat food or liquids, as this can cause burns or fires. Clean spills promptly to prevent odors and damage. Avoid overheating oils, and never leave cooking unattended. Keep the oven vent clear for proper airflow. Use the child safety lock to prevent accidental start. Follow these guidelines to ensure safe and efficient operation.
Precautions to Avoid Accidents
To ensure safe operation of the GE JES1109RRSS microwave, follow these precautions. Always supervise children when the appliance is in use. Avoid using metal utensils or aluminum foil, as they can cause sparks. Never heat eggs in their shells or sealed containers, as they may explode. Keep the microwave clean to prevent food residue from catching fire. Do not lean on the oven door or stand too close during operation. Always use oven mitts when removing hot dishes. Follow these guidelines to prevent accidents and ensure safe cooking.
Operating Instructions
The GE JES1109RRSS microwave offers intuitive touch-pad controls for easy operation. Select cooking modes, set timers, and adjust power levels with precision. Follow on-screen prompts for guided cooking.
Using the Touch-Pad Controls
The GE JES1109RRSS features an electronic touch-pad interface for easy navigation. Simply press the desired buttons to select cooking modes, set timers, or adjust power levels. The Start/+30s button quickly starts cooking or adds time, while the Stop/Clear button pauses or resets the oven; Use the number pads to input specific cooking times, and adjust power levels with the appropriate buttons. The display provides clear feedback, ensuring precise control over your cooking process. Refer to the manual for detailed instructions on all touch-pad functions.
Cooking Modes and Settings
The GE JES1109RRSS offers multiple cooking modes to suit various needs, including defrosting, automatic cooking, and convection cooking. The microwave also features a convenient air fry mode for healthier frying options. Users can select from preset settings for common tasks like reheating leftovers or cooking popcorn. The touch-pad interface allows easy adjustment of power levels and cooking times. A built-in kitchen timer adds versatility, enabling precise control over your cooking process. The digital display provides clear guidance for each mode, ensuring optimal results every time.
Kitchen Timer and Additional Features
The GE JES1109RRSS features a convenient kitchen timer that operates independently of the cooking time, allowing users to monitor and manage their cooking progress effortlessly. Additional features include a child safety lock to prevent accidental operation and a digital display that provides clear feedback. The microwave also offers a touch-pad interface for easy navigation of settings and modes. These features enhance usability, ensuring a seamless cooking experience while maintaining safety and efficiency in the kitchen.

Maintenance and Troubleshooting
Regularly clean the microwave’s interior and filters to ensure optimal performance. Refer to the manual for troubleshooting common issues like error codes or malfunctioning buttons. Always unplug before cleaning.
Cleaning and Care Tips
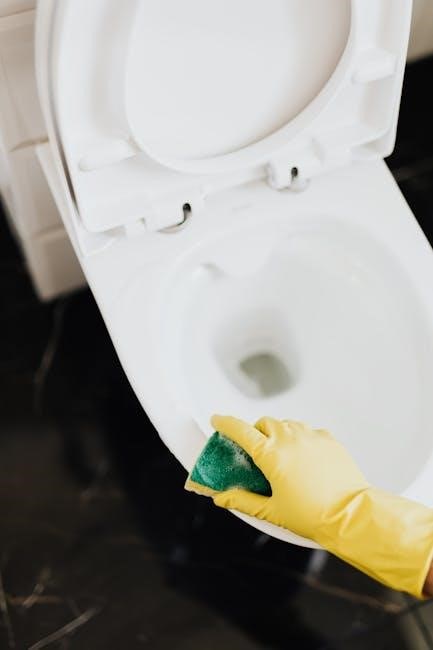
Regular cleaning is essential for maintaining your GE JES1109RRSS microwave’s performance. Wipe the interior with a damp cloth after each use to prevent food residue buildup. For tougher stains, mix water and vinegar on a microwave-safe bowl and heat for 2-3 minutes to loosen grime. Avoid using abrasive cleaners or metal scourers, as they may damage surfaces. Clean the turntable and supports with mild soap and water. For exterior cleaning, use a soft cloth and gentle detergent. Always unplug the microwave before cleaning for safety.
Troubleshooting Common Issues
If the microwave is not working, check the power supply and ensure the door is closed properly. If uneven cooking occurs, ensure food is placed correctly and rotate dishes as needed. Strange noises may indicate food debris or improper turntable placement. For error codes, consult the manual or reset the microwave. If issues persist, clean the interior thoroughly and verify all components are functioning. Refer to the troubleshooting section in the manual for detailed solutions or contact GE customer support.
Warranty and Support
The GE JES1109RRSS microwave is backed by a comprehensive warranty. For detailed coverage, register your appliance online or refer to the warranty section in the manual. Support is available through GE’s customer service, with resources and contact information provided in the manual or on the GE Appliances website.
Understanding the Warranty Coverage
The GE JES1109RRSS microwave comes with a warranty that covers parts and labor for one year from the date of purchase. This warranty ensures that any manufacturing defects or issues are addressed promptly. Extended warranty options may also be available for additional coverage. It’s essential to review the warranty terms in the manual for specific details. For any inquiries or assistance with your GE JES1109RRSS microwave, visit the official GE Appliances website or call their customer service at 1-800-626-2005. You can also access live chat support or consult the FAQs section on their site. Additionally, the manual provides detailed contact information for troubleshooting or warranty-related questions. Registering your appliance online ensures faster assistance and personalized support. Always refer to the manual for specific contact details and guidelines for reaching customer service effectively. The GE JES1109RRSS manual is available online for free download. Visit the official GE Appliances website or trusted manual databases to access the PDF. The GE JES1109RRSS manual can be downloaded for free from the official GE Appliances website or trusted platforms like ManualsLib and ManualsOnline. Simply search for “GE JES1109RRSS manual” to access the PDF. Ensure your device is connected to the internet, and registration may be required on some sites. These platforms provide easy access to the manual, allowing you to view or print it as needed. Always verify the model number to ensure you download the correct document. The GE JES1109RRSS manual is organized into clear sections, starting with safety information and installation guidelines. The table of contents provides quick access to specific topics like operating instructions, cooking modes, and maintenance tips. Users can easily navigate through the manual by referencing the index or using the search function in the PDF. Each section is designed to guide you through setup, operation, and troubleshooting, ensuring a smooth experience with your microwave oven. The GE JES1109RRSS microwave oven is a practical and efficient appliance for modern kitchens. Its advanced features, including convection cooking and air frying, make it a versatile choice for various cooking needs. By following the manual’s guidelines, users can ensure safe and optimal performance. With its compact design and easy-to-use controls, this microwave offers a convenient cooking solution, making it an excellent addition to any household.
Downloading and Using the Manual
Where to Find the Manual Online
How to Navigate the Manual