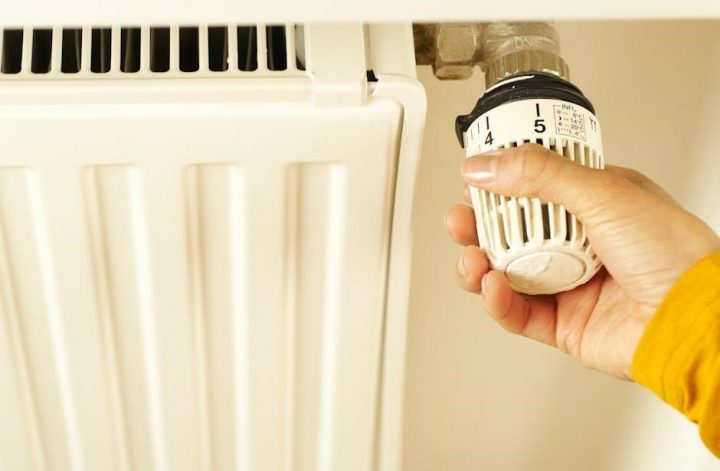
The Honeywell TH6220U2000 is a programmable thermostat designed for ease of use and advanced temperature control. It offers features like automatic changeover and geofencing capabilities. This guide provides detailed installation and configuration steps to ensure optimal performance.
1.1 Overview of the Thermostat and Its Features
The Honeywell TH6220U2000 is a programmable thermostat designed for efficient temperature control. It features programmable scheduling, automatic changeover, and geofencing for smart home integration. The thermostat supports energy-saving modes and includes an optional cover plate for a seamless installation. With advanced installer settings and a user-friendly interface, it offers flexibility for both residential and light commercial use. The device is compatible with various HVAC systems and requires a common (C) wire for operation. Its sleek design and intuitive controls make it a popular choice for modern homes seeking precise climate management. This guide provides detailed steps to install and configure the thermostat for optimal performance.
1.2 Importance of the Installation Manual
The installation manual for the Honeywell TH6220U2000 is essential for a successful and safe setup. It provides detailed step-by-step instructions to ensure compatibility with your HVAC system and proper wiring configurations; Failure to follow the manual can result in damage to the thermostat or hazardous conditions. The guide also includes troubleshooting tips and maintenance advice to keep the device functioning optimally. By adhering to the manual, you can avoid common installation errors and ensure the thermostat operates efficiently. This document serves as a comprehensive reference for both initial setup and future adjustments, making it indispensable for users and installers alike. Proper installation ensures safety and performance.
Pre-Installation Requirements
Before installing the Honeywell TH6220U2000, ensure compatibility with your HVAC system and gather all necessary tools. Verify the need for a C wire connection.
2.1 Compatibility Check for Your HVAC System
Before installing the Honeywell TH6220U2000, verify its compatibility with your HVAC system. The thermostat supports most heating, cooling, and heat pump systems. Check if your system requires a common (C) wire, as this model can operate without it in some configurations. Ensure your HVAC system matches the voltage and stage requirements specified in the manual. If unsure, consult a professional to avoid installation issues. Proper compatibility ensures optimal performance and prevents potential damage to your system. Refer to the installation manual for detailed specifications and guidance. This step is crucial for a smooth setup process. Always prioritize system compatibility for reliability.
2.2 Tools and Materials Needed for Installation
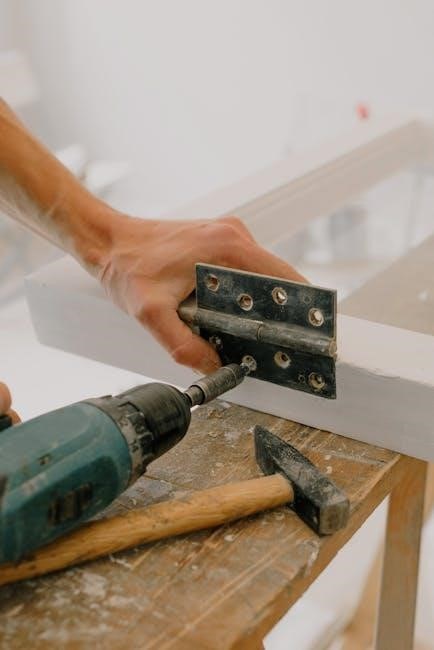
To install the Honeywell TH6220U2000 thermostat, you’ll need several tools and materials to ensure a smooth process. Start with a drill and drill bits for making wall holes. A screwdriver set, including Phillips and flathead options, is essential for securing the thermostat and wiring connections. Pliers and wire strippers will help manage the wiring. Additionally, a level ensures proper alignment during mounting. A voltage tester is recommended to verify electrical safety. Finally, refer to the installation manual for any system-specific requirements. Gathering these tools beforehand will save time and reduce installation hassles. Always double-check the manual for any additional materials needed.
Installation Steps
The Honeywell TH6220U2000 installation involves opening the package, inventorying parts, mounting the thermostat, wiring, connecting the common wire, and finalizing the setup. Follow the manual carefully.
3.1 Opening the Package and Inventory of Parts
Carefully open the Honeywell TH6220U2000 package and verify all components are included. Ensure you have the thermostat unit, mounting plate, screws, and batteries. Check for any damage. Review the installation manual provided in the package or downloaded as a PDF for detailed instructions. Familiarize yourself with the wiring diagram and tools required, such as a screwdriver and drill. Before starting, ensure you have all necessary materials to avoid delays. If this is your first time installing a thermostat, consider consulting the manual’s troubleshooting section for common issues. Proper preparation ensures a smooth installation process.
3.2 Mounting the Thermostat on the Wall
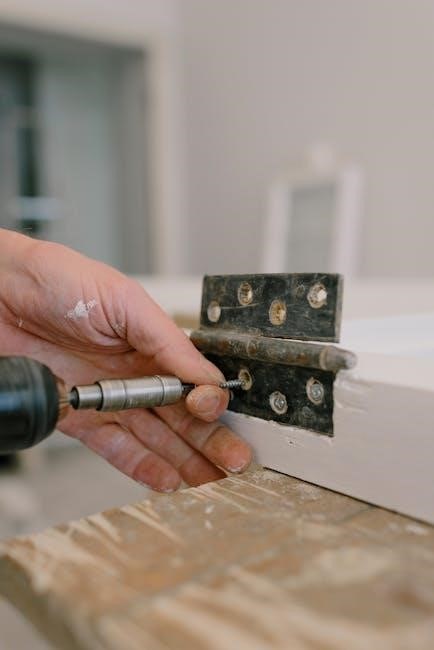
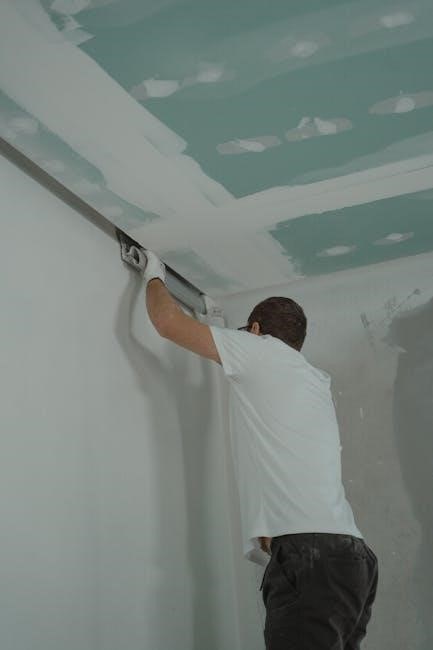
To mount the Honeywell TH6220U2000, begin by ensuring the wall surface is level and clear. Use the provided mounting plate to mark hole positions, then drill pilot holes. Secure the plate with screws, avoiding overtightening. If installing without an electrical junction box, attach the optional cover plate to cover gaps or uneven surfaces. Position the thermostat on the plate, aligning it properly. Tighten the screws to hold it firmly in place. Refer to the installation manual for specific guidance on alignment and securing the device; Proper mounting ensures stability and functionality. Always follow the manufacturer’s instructions for a secure installation.
3.3 Wiring the Thermostat
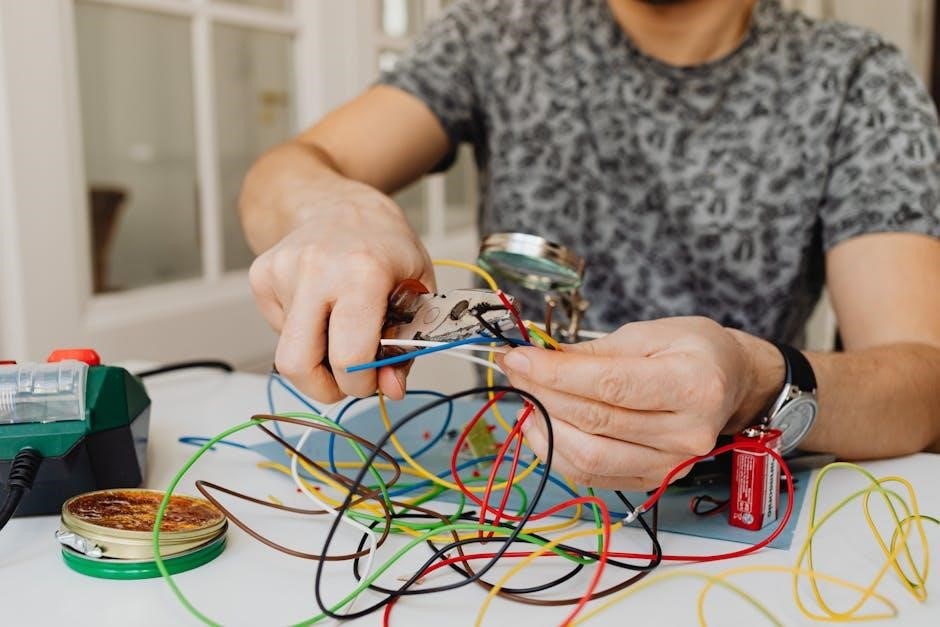
To wire the Honeywell TH6220U2000, first ensure the power to your HVAC system is turned off. Identify and connect the appropriate wires to their corresponding terminals on the thermostat. Refer to the installation manual for specific wire labeling (e.g., R, W, Y, G, C). If your system requires a common (C) wire, connect it to the C terminal. For systems without a C wire, follow the instructions for proper jumper installation. Ensure all connections are secure to avoid malfunctions. After wiring, turn the power back on and test the thermostat to confirm proper operation. Always follow the manufacturer’s guidelines for safe and correct wiring.
3.4 Connecting the Common (C) Wire
The common (C) wire is essential for powering the Honeywell TH6220U2000 thermostat. If your HVAC system has a C wire, connect it to the C terminal on the thermostat. For systems without a C wire, you may need to use a jumper wire between the R and C terminals. Refer to the installation manual for specific instructions. Ensure the connection is secure to prevent power issues. If unsure, consult a professional or the manual for guidance. Proper C wire configuration is critical for the thermostat’s operation and advanced features like geofencing and smart home integration. Always follow safety precautions when handling wiring.
3.5 Finalizing the Installation
Once all wires are connected and the thermostat is mounted, restore power to your HVAC system. Turn the power on at the circuit breaker and test the thermostat by adjusting the temperature settings. Ensure the system responds correctly to heating and cooling commands. Check for any gaps around the thermostat and secure it firmly to the wall. If using the optional cover plate, install it to conceal any paint gaps or uneven surfaces. Double-check all connections for tightness and ensure no wires are loose. Refer to the manual for initial configuration steps, such as setting the date, time, and preferred temperature range. Finally, review the installation to ensure everything is properly secured and functioning as expected.
Features of the Honeywell TH6220U2000
The Honeywell TH6220U2000 features programmable scheduling, automatic changeover, geofencing, and energy-saving modes, ensuring efficient and advanced temperature control for optimal wi-fi smart home compatibility.
4.1 Programmable Scheduling Options
The Honeywell TH6220U2000 offers flexible programmable scheduling, allowing users to set temperature preferences for different times of the day or week. This feature ensures energy efficiency by adjusting temperatures when the home is unoccupied or during sleep hours. Through the user-friendly interface or the Honeywell Home app, users can create custom schedules that align with their lifestyle. The thermostat also supports geofencing, automatically changing settings based on the user’s location. These scheduling options make it easy to maintain a comfortable environment while reducing energy consumption, contributing to lower utility bills and a more sustainable home.
4.2 Automatic Changeover Differential
The Honeywell TH6220U2000 features an automatic changeover differential, enabling seamless transitions between heating and cooling modes. This advanced feature ensures the system operates efficiently by automatically switching modes based on temperature settings. The differential range is adjustable from 0°F to 5°F (0.0°C to 2.5°C), allowing users to customize the transition sensitivity. Unlike a traditional deadband, this differential optimizes comfort and energy use by preventing unnecessary cycling. Proper configuration of this feature is essential for maintaining consistent indoor temperatures and reducing energy consumption. The manual provides detailed instructions for setting up the differential to suit specific climate needs and system requirements.
4.3 Geofencing and Smart Home Integration
The Honeywell TH6220U2000 supports geofencing and smart home integration, enhancing user convenience and energy efficiency. Geofencing uses your smartphone’s location to automatically adjust temperatures when you leave or arrive home. This feature ensures energy savings by optimizing heating and cooling based on occupancy. Additionally, the thermostat is compatible with popular smart home platforms like Amazon Alexa and Google Home, allowing voice control and seamless integration with other smart devices. The Honeywell Home app enables remote access, scheduling, and system monitoring. These advanced features make the thermostat a versatile and modern solution for smart home enthusiasts, offering enhanced comfort and energy management capabilities.
4.4 Energy-Saving Modes
The Honeywell TH6220U2000 features energy-saving modes designed to reduce energy consumption without compromising comfort. These modes adjust temperature settings to optimize energy use, especially when the home is unoccupied or during sleep hours. The thermostat also learns your schedule and preferences to minimize unnecessary heating or cooling. Smart home integration further enhances energy savings by allowing remote adjustments and system monitoring. Additionally, the thermostat provides energy usage reports to help you identify areas for improvement. By leveraging these energy-saving modes, homeowners can lower their utility bills while maintaining a comfortable living environment. This feature is a key advantage of the Honeywell TH6220U2000.

Configuring the Thermostat
Configuring the Honeywell TH6220U2000 involves setting up initial parameters, adjusting temperature schedules, and enabling advanced features like geofencing; The thermostat’s intuitive interface simplifies customization.
5.1 Setting Up the Initial Configuration
Setting up the initial configuration of the Honeywell TH6220U2000 involves powering on the device and navigating through the menu. First, select the language and unit of measurement. Next, choose between heating or cooling mode depending on your system. The thermostat will guide you through setting the date and time. Ensure the time zone is correctly configured for accurate scheduling. You may also need to enable features like geofencing if you plan to use smart home integration. Refer to the installation manual for detailed steps to avoid configuration errors. Proper setup ensures optimal performance and energy efficiency.
5.2 Adjusting the Temperature Settings
Adjusting the temperature settings on the Honeywell TH6220U2000 is straightforward. Use the touchscreen interface to set your desired temperature. The thermostat allows you to adjust settings in 1°F increments. For energy efficiency, enable features like automatic changeover or energy-saving modes. You can also program daily or weekly schedules to maintain consistent temperatures. The thermostat supports a temperature range of 40°F to 90°F for heating and 50°F to 99°F for cooling. Additionally, the differential setting can be customized to balance comfort and energy savings. Refer to the manual for specific instructions on configuring these settings to suit your preferences and HVAC system requirements. Proper adjustment ensures optimal performance and comfort.
5.3 Using the Optional Cover Plate
The optional cover plate for the Honeywell TH6220U2000 provides a sleek finish and conceals any gaps left by previous thermostats. To install, simply align the plate with the thermostat’s mounting plate and secure it with the provided screws. Ensure the plate is tightly fitted to avoid any movement. The cover plate is ideal for maintaining a clean appearance, especially during renovations or upgrades. It is compatible with standard electrical junction boxes and does not interfere with the thermostat’s functionality. Follow the installation manual for precise instructions to ensure proper fitting and alignment. This accessory enhances both the aesthetic and protective aspects of your thermostat installation.

Advanced Installer Setup
Access the advanced menu to configure installer settings, ensuring optimal performance and compatibility. Follow the manual for precise instructions to avoid installation issues.
6.1 Accessing the Advanced Menu
To access the advanced menu on the Honeywell TH6220U2000, press and hold the “Menu” button until “Adv” appears on the screen. Use the touchscreen to navigate through installer settings. This menu allows customization of system parameters, such as temperature differentials and wiring configurations. Ensure all changes align with your HVAC system’s requirements to avoid performance issues. Refer to the installation manual for detailed instructions and safety precautions. Proper configuration is essential for optimal thermostat functionality. Failure to follow guidelines may result in system damage or unsafe operating conditions. Always consult the manual before making advanced adjustments.
6;2 Configuring the Installer Settings
Configuring the installer settings on the Honeywell TH6220U2000 involves setting up system-specific parameters. Navigate to the advanced menu and select “Installer Settings.” Here, you can configure options like the changeover differential, heat pump settings, and temperature limits. Ensure all settings match your HVAC system’s specifications. For instance, the changeover differential can be adjusted between 0°F to 5°F. Proper configuration ensures efficient heating and cooling. Refer to the installation manual for detailed instructions to avoid errors. Incorrect settings may lead to system inefficiency or damage. Always test the system after making changes to confirm proper operation. This step is crucial for optimal thermostat performance.
Maintenance and Troubleshooting
Regular maintenance ensures the Honeywell TH6220U2000 operates efficiently. Clean the display and sensors periodically. Check wiring connections and update software. Troubleshoot common issues like temperature inaccuracies or display malfunctions by referring to the manual.
7.1 Routine Maintenance Tips
To maintain optimal performance, clean the thermostat’s display and sensors regularly using a soft cloth. Ensure all wiring connections are secure; Check for software updates and install them promptly. Replace batteries if applicable and inspect the optional cover plate for proper fit. Refer to the manual for detailed instructions. Regular maintenance prevents issues like temperature inaccuracies or display malfunctions. Follow these tips to extend the thermostat’s lifespan and ensure reliable operation.
7.2 Common Issues and Solutions
Common issues with the Honeywell TH6220U2000 include display malfunctions, temperature inaccuracies, or connectivity problems. To resolve these, restart the thermostat, check wiring connections, and ensure proper installation. If the display is unresponsive, refer to the manual for reset procedures. For temperature errors, verify sensor calibration and ensure no drafts affect the thermostat. Connectivity issues may require checking your Wi-Fi network or reinstalling the Honeywell Home app. Always consult the manual for troubleshooting steps before contacting support. Regular maintenance and software updates can prevent many of these issues.
This section addresses common queries about the Honeywell TH6220U2000, including installation, troubleshooting, and features, providing clear answers for users seeking assistance. What is the Honeywell TH6220U2000 thermostat? The Honeywell TH6220U2000 is a programmable thermostat designed for efficient temperature control. It offers advanced features like automatic changeover and smart home integration, making it a versatile choice for modern HVAC systems. Is the thermostat compatible with my HVAC system? Compatibility depends on your system type. The thermostat supports most heating and cooling systems, but it’s recommended to check the manual or consult a professional. Does it require a C wire? Yes, the Honeywell TH6220U2000 typically requires a C wire for power. However, some setups may work without it, depending on the HVAC system configuration. Can I control it remotely? Yes, the thermostat supports geofencing and smart home integration, allowing remote control through the Honeywell Home app. What is the warranty period? The product usually comes with a limited warranty. For details, refer to the official Honeywell website or the installation manual. Is it energy-efficient? Yes, the thermostat offers energy-saving modes and programmable scheduling to optimize energy usage and reduce utility bills. How do I reset the thermostat? Resetting can be done by removing the batteries or following the reset procedure in the manual. Always refer to the instructions to avoid any issues. Where can I find the user manual? The manual is available for download on Honeywell’s official website or through authorized distributors. Can I install it myself? Yes, but it’s recommended to follow the installation guide carefully or seek professional help if unsure. Does it support multiple stages? Yes, it supports multi-stage heating and cooling systems, ensuring precise temperature control. What is the temperature range? The thermostat typically operates within a range of 40°F to 90°F (4.4°C to 32.2°C). Are there any safety precautions? Yes, always turn off power to the HVAC system before installation or maintenance to avoid injury or damage. How do I update the software? Updates are typically handled through the Honeywell Home app. Ensure your thermostat is connected to Wi-Fi for automatic updates. Can I use it without Wi-Fi? Yes, the thermostat functions without Wi-Fi, but smart features like geofencing and remote access won’t be available. What if the display is blank? A blank display may indicate low battery or power issues. Check the batteries or wiring connections. How do I set up geofencing? Geofencing is configured through the Honeywell Home app. Follow the app’s instructions to enable location-based temperature adjustments. Does it work with smart home systems? Yes, it integrates with popular smart home platforms like Amazon Alexa and Google Home for voice control and enhanced functionality. Can I lock the thermostat? Yes, the thermostat offers a lock feature to prevent unauthorized changes. Refer to the manual for activation steps. How do I set a schedule? Scheduling can be done directly on the thermostat or through the app. Program your preferred temperatures for different times of the day. What if it doesn’t turn on? Check the power source, ensure the thermostat is properly wired, and verify that the HVAC system is functioning correctly. Can I use it in commercial settings? While designed for residential use, it can be adapted for light commercial applications. Consult a professional to ensure compatibility. Does it have a backlit display? Yes, the thermostat features a backlit display for easy visibility in low-light conditions. How do I clean the thermostat? Use a soft cloth to wipe the display and exterior. Avoid harsh chemicals to prevent damage. What if the temperature is inaccurate? Check the thermostat’s calibration settings or ensure proper installation of the temperature sensor. Can I transfer settings to a new thermostat? No, settings are stored locally and must be reconfigured on the new device. Is it Energy Star certified? Yes, the Honeywell TH6220U2000 is Energy Star certified, ensuring energy efficiency and cost savings. Does it support dual fuel systems? Yes, it is compatible with dual fuel systems, providing efficient heating and cooling in such configurations. What is the part number for replacement? The part number is TH6220U2000. Ensure compatibility before ordering any replacements. Can I use it with a heat pump? Yes, the thermostat supports heat pumps, including auxiliary heat control for optimal performance. Does it have a vacation mode? Yes, the thermostat allows you to set a vacation mode to maintain energy-efficient temperatures while you’re away. How do I access advanced settings? Advanced settings are accessed through the installer menu. Refer to the manual for detailed instructions. Can I customize the screen color? Yes, the display color can be adjusted to match your home’s decor. Does it support multiple thermostats in one system? Yes, it can be integrated with zoning systems for multi-zone temperature control. What is the warranty coverage? The warranty typically covers defects in materials and workmanship for a specified period. Can I use it with radiant floor heating? Yes, the thermostat is compatible with radiant floor heating systems, ensuring precise temperature control. How do I reset the schedule? Resetting the schedule can be done by deselecting all programmed times or restoring factory settings. Does it support humidity control? Yes, the thermostat can integrate with humidity control systems for enhanced indoor air quality. Can I use it with a boiler system? Yes, it is compatible with boiler systems, providing accurate temperature regulation. What if the thermostat is unresponsive? Try resetting it by removing batteries or checking the power supply. If issues persist, contact Honeywell support. Does it have a touchscreen interface? Yes, the thermostat features an intuitive touchscreen interface for easy navigation and programming. Can I lock out certain features? Yes, the thermostat allows you to lock out specific features to prevent unauthorized changes. What is the expected lifespan? The lifespan varies depending on usage and environment, but with proper care, it can last for many years. Does it support multi-language display? Yes, the thermostat offers multi-language support, making it accessible to a wide range of users. Can I use it with solar systems? Yes, the thermostat is compatible with solar HVAC systems, optimizing energy usage from renewable sources. What if the thermostat is not level? Ensure the thermostat is properly leveled during installation to maintain accurate temperature readings. Does it have a built-in timer? Yes, the thermostat includes a built-in timer for scheduling temperature changes throughout the day. Can I use it with a dehumidifier? Yes, the thermostat can be integrated with dehumidifiers for comprehensive climate control. What is the maximum temperature it can handle? The thermostat can handle temperatures up to 90°F (32.2°C) in cooling mode and as low as 40°F (4.4°C) in heating mode. Does it support remote sensors? Yes, the thermostat can be used with remote sensors to monitor temperatures in different areas of your home. Can I use it with a whole-house fan? Yes, the thermostat is compatible with whole-house fans for energy-efficient cooling. What if the screen is cracked? Contact Honeywell support for repair or replacement options if the screen is damaged. Does it support smart recovery? Yes, the thermostat features smart recovery, which learns your schedule to pre-heat or pre-cool your home efficiently. Can I use it with a heat recovery system? Yes, the thermostat is compatible with heat recovery systems for optimal energy performance. What if the thermostat is not communicating with the HVAC system? Check the wiring connections and ensure all components are properly linked. If issues persist, consult a professional. Does it support multiple heating stages? Yes, the thermostat supports up to three heating stages and two cooling stages for precise temperature control. Can I use it with a dual compressor system? Yes, the thermostat is designed to work with dual compressor systems, ensuring efficient operation. What is the minimum temperature it can handle? The thermostat can handle temperatures as low as 40°F (4.4°C) in heating mode. Does it support multi-zone control? Yes, the thermostat can be integrated into multi-zone systems for independent temperature control in different areas. Can I use it with a boiler and radiator system? Yes, the thermostat is compatible with boiler and radiator systems, providing reliable temperature regulation. What if the thermostat is making noise? Check for loose mounting screws or internal components. If noise persists, contact Honeywell What tools do I need for installation? You will need a screwdriver, drill, wall anchors, and possibly a level. Refer to the manual for a detailed list of required tools. Do I need a C wire? Yes, a C wire is typically required for proper operation. However, some systems may not need it, so check your HVAC setup. How do I mount the thermostat? Mount the thermostat on a flat wall surface, ensuring it is level. Use the provided template to mark drill holes accurately. Can I install it myself? Yes, but follow the manual carefully. If unsure, consider hiring a licensed HVAC technician to avoid potential issues. What if I have a dual-fuel system? The thermostat supports dual-fuel systems. Ensure proper configuration during installation for optimal performance. Can I reuse the old thermostat’s wiring? Yes, but verify the wiring matches the Honeywell TH6220U2000’s requirements. Consult the manual for wiring diagrams. How long does installation take? Installation typically takes 1-2 hours, depending on system complexity and your familiarity with electrical systems. Do I need to turn off power? Yes, always turn off power to the HVAC system at the circuit breaker before starting installation. What if I drill into a water pipe? Use a stud finder to avoid pipes and wires. If unsure, consult a professional. Can I install it in a humid environment? Yes, but ensure the area is well-ventilated and avoid direct exposure to water. How do I secure the mounting plate? Use the provided screws or wall anchors to secure the plate firmly to the wall. Do not overtighten. What if the thermostat isn’t level? An unlevel thermostat may cause inaccurate temperature readings. Use a level tool during installation. Can I install it in a rental property? Yes, but check with your landlord or property manager before making any changes. What if I lose the manual? The manual is available for download on Honeywell’s official website or through authorized distributors. Do I need a permit for installation? Check local regulations. A permit may be required for electrical work. Can I install it in a mobile home? Yes, but ensure the thermostat is compatible with your mobile home’s HVAC system. What if I encounter wiring issues? Consult the wiring diagram in the manual. If unsure, contact a licensed electrician. Can I install it outdoors? No, the thermostat is designed for indoor use only. How do I test the thermostat after installation? Set the thermostat to a specific temperature and verify the HVAC system responds correctly. What if the screen is blank after installation? Check the power supply and wiring connections. Ensure the C wire is properly connected. Can I install it near a window? Yes, but avoid direct sunlight or drafts to ensure accurate temperature readings. What if I need to move the thermostat? Turn off power, remove the thermostat, and reinstall it at the new location following the manual’s instructions. Do I need to program it after installation? Yes, set up your preferred schedule and temperature settings after installation for optimal performance. What if I have a zoned system? The thermostat can be integrated with zoned systems. Consult the manual or a professional for configuration. Can I install it in a basement? Yes, but ensure proper ventilation and avoid areas prone to moisture. What if the thermostat doesn’t fit the junction box? Use the optional cover plate to cover any gaps or irregularities. Do I need to insulate the wires? Yes, ensure all wires are properly insulated and securely connected to avoid electrical issues. Can I install it in an apartment? Yes, but check with your landlord or building management for any restrictions. What if I have a boiler system? The thermostat is compatible with boiler systems. Follow the manual’s specific instructions for boiler setups. Do I need to test the thermostat before finalizing installation? Yes, test the thermostat by running a heating and cooling cycle to ensure proper operation. What if I have a radiant floor heating system? The thermostat supports radiant floor heating. Refer to the manual for specific configuration steps. Can I install it in a garage? Yes, but ensure the thermostat is protected from extreme temperatures and humidity. What if I need to replace an old thermostat? Follow the manual’s instructions for removing the old thermostat and installing the new one. Do I need to update the thermostat’s software after installation? Yes, ensure the thermostat has the latest firmware for optimal performance. Use the Honeywell Home app to check for updates. What if I have a geothermal system? The thermostat is compatible with geothermal systems. Consult the manual for specific setup requirements. Can I install it in a vacation home? Yes, the thermostat’s vacation mode and remote access features make it ideal for vacation homes. What if I have a heat pump system? The thermostat supports heat pump systems. Follow the manual’s guidelines for proper configuration. Do I need to calibrate the thermostat after installation? Yes, calibrate the thermostat to ensure accurate temperature readings. Follow the manual’s calibration procedure. What if I have a multi-stage HVAC system? The thermostat supports multi-stage systems. Refer to the manual for configuration details. Can I install it in a commercial building? Yes, but consult a professional to ensure compatibility with your specific HVAC setup. What if I have a dual compressor system? The thermostat is designed to work with dual compressor systems. Follow the manual’s instructions for setup. Do I need to register the thermostat after installation? Yes, register your thermostat on Honeywell’s website or through the app to access warranty and support services. What if I have a zoning system? The thermostat can be integrated with zoning systems. Consult the manual or a professional for configuration. Can I install it in a new construction home? Yes, the thermostat is ideal for new construction homes. Follow the manual’s installation guide. What if I have a solar HVAC system? The thermostat supports solar HVAC systems. Refer to the manual for specific setup instructions. Do I need to test the thermostat’s Wi-Fi connection after installation? Yes, ensure the thermostat connects to your Wi-Fi network for smart features like remote access and geofencing. What if I have a dehumidifier? The thermostat can be integrated with dehumidifiers. Follow the manual’s instructions for setup. Can I install it in a manufactured home? Yes, but ensure the thermostat is compatible with your HVAC system and follow the manual’s instructions. What if I have a radiant cooling system? The thermostat supports radiant cooling systems. Refer to the manual for specific configuration steps. Do I need to update the thermostat’s software regularly? Yes, regular updates ensure you have the latest features and security patches. Use the Honeywell Home app to update. What if I have a heat recovery system? The thermostat is compatible with heat recovery systems. Follow the manual’s guidelines for setup. Can I install it in a high-rise building? Yes, but consult a professional to ensure compatibility with your specific HVAC setup. What if I have a multi-zone HVAC system? The Honeywell TH6220U2000 thermostat offers energy efficiency, programmable scheduling, and smart home integration. Follow the manual for proper installation and configuration to ensure optimal performance.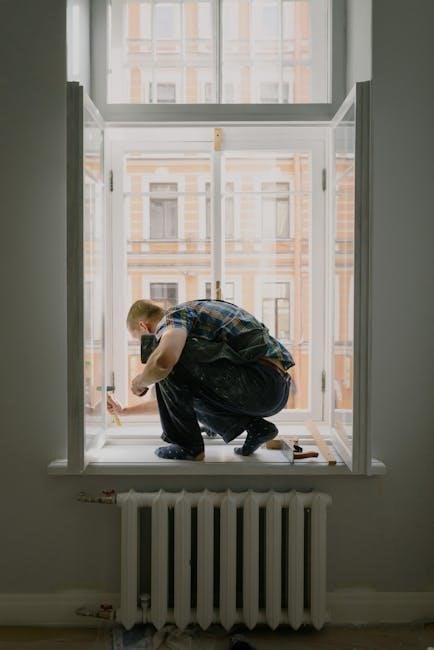
Frequently Asked Questions
8.1 General Questions About the Thermostat


8.2 Installation-Related Questions