pro t705 thermostat manual

The Pro T705 Thermostat is a programmable, energy-efficient device designed for ease of use․ It features 4 programmable time periods, a backlit display, and compatibility with most HVAC systems․

Overview of the Pro T705 Thermostat

The Pro T705 Thermostat is a programmable device designed for optimal performance and energy efficiency․ It features 4 programmable time periods, a backlit display, and compatibility with most HVAC systems․ The thermostat includes a glow-in-the-dark light button, fan switch, and system mode controls․ It operates on high-quality alkaline batteries and offers a 5-year limited warranty․ Installation requires placement 4-5 feet above the floor in an area with average temperature and good air circulation․ Simple operating instructions are located on the back of the battery door․

Importance of the Manual for Proper Usage

The manual is essential for proper usage and optimal performance of the Pro T705 Thermostat․ It provides detailed instructions for installation, programming, and troubleshooting, ensuring safe and efficient operation․ The manual covers key features, programmable time periods, and warranty information․ Understanding the manual prevents errors, enhances energy savings, and prolongs the device’s lifespan․ It also outlines safety precautions and maintenance tips, making it a crucial resource for users to maximize the thermostat’s functionality and maintain its performance over time․

Installation Guide for the Pro T705 Thermostat

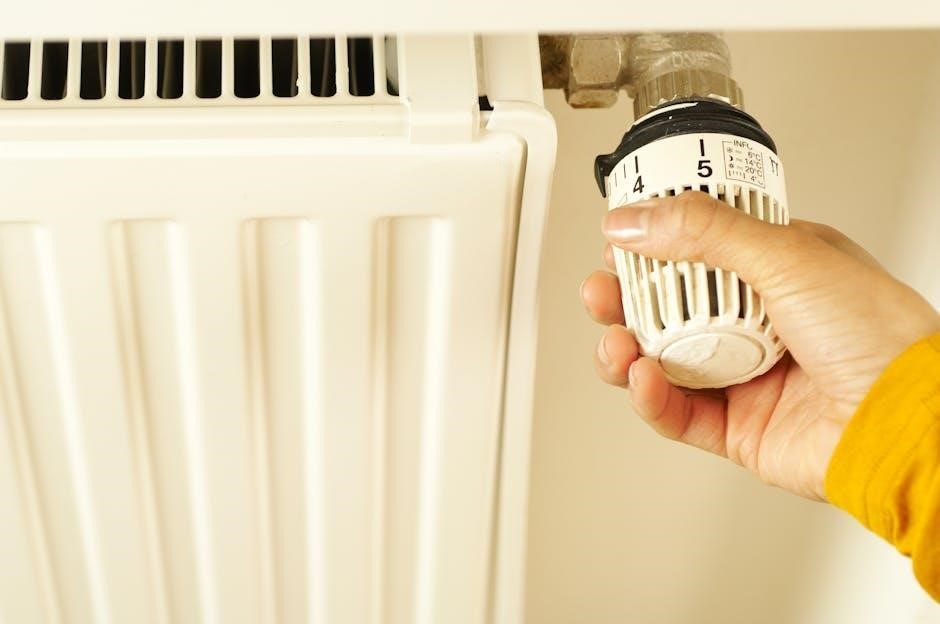
The Pro T705 Thermostat installation requires placing it 4-5 feet above the floor in an area with average temperature and good air circulation․ Follow the manual for proper setup․

Pre-Installation Requirements and Safety Precautions

  • Ensure the thermostat is installed 4-5 feet above the floor in an area with average temperature and good air circulation․
  • Avoid installing near direct sunlight, drafts, or extreme temperatures for accurate readings․
  • Use shielded or non-shielded 18-22 gauge thermostat wire for proper connections․
  • Turn off power to the HVAC system before starting the installation to prevent electrical hazards․
  • Use high-quality alkaline batteries if the thermostat is not hardwired;
  • Handle the device gently to avoid damage during installation․

Step-by-Step Installation Process

  1. Turn off power to the HVAC system at the circuit breaker․
  2. Remove the old thermostat, noting wire connections for reference․
  3. Mount the new thermostat base to the wall, ensuring level placement․
  4. Connect wires to the appropriate terminals, matching colors if coded․
  5. Attach the thermostat faceplate to the base securely․
  6. Restore power and test the system to ensure proper operation․

Operating the Pro T705 Thermostat

The Pro T705 Thermostat features a backlit display for easy navigation, programmable settings, and battery operation․ It includes a glow-in-the-dark button for convenience and energy-efficient performance․

Understanding the Thermostat’s Basic Features

The Pro T705 Thermostat offers essential features such as a backlit display, programmable time periods, and a system switch for heat or cool modes․ The glow-in-the-dark button provides easy navigation in low-light conditions․ Battery operation ensures reliability, and the device includes a low-battery indicator․ Simple operating instructions are located on the back of the battery door, making it user-friendly․ The thermostat supports up to four programmable periods per day, enhancing energy efficiency and comfort․

Navigating the Advanced Features and Settings

The Pro T705 Thermostat offers advanced features such as compressor delay to prevent system damage and a fan switch for precise control․ The ELEC position allows the thermostat to manage the fan during heating cycles․ Users can customize temperature schedules and adjust settings via the menu interface․ It supports energy-saving modes and is compatible with most HVAC systems, including heat pumps․ The device also provides clear navigation through its menu for optimal customization and efficiency․

Programming the Pro T705 Thermostat

The Pro T705 allows for 4 programmable time periods per day, enabling users to customize temperature settings for energy efficiency․ Refer to the manual for detailed instructions․

Setting Up Programmable Time Periods

The Pro T705 Thermostat offers 4 programmable time periods per day, allowing users to set specific temperatures for different times․ These periods can be customized to suit your daily schedule, enhancing energy efficiency; To set up, navigate to the menu, select the desired period, and adjust the temperature․ The thermostat also features a pre-set energy-saving program, which can be modified to fit your preferences․ Refer to the manual for detailed step-by-step guidance on programming․

Customizing Your Temperature Schedule

Customizing your temperature schedule on the Pro T705 Thermostat allows you to set different temperatures for each of the 4 programmable periods; Use the backlit display to easily adjust settings․ The thermostat features a pre-programmed energy-saving schedule that you can modify to fit your lifestyle․ For detailed instructions, refer to the operating manual․ This ensures your heating and cooling system operates efficiently, tailoring comfort to your daily routine․

Troubleshooting Common Issues

Identify and resolve common problems with the Pro T705 Thermostat, such as temperature inaccuracies or display issues, to ensure optimal performance․ Refer to the manual for detailed guidance․

Identifying and Resolving Common Problems

Common issues with the Pro T705 Thermostat include inaccurate temperature readings, display malfunctions, or the system not turning on․ Check wiring connections and ensure batteries are fresh․ If the thermostat fails to respond, reset it by removing batteries for 10 seconds․ For display issues, refer to the manual or contact support․ Addressing these problems promptly ensures optimal performance and energy efficiency․

Resetting the Thermostat to Factory Settings

To reset the Pro T705 Thermostat to factory settings, remove the batteries and wait 10 seconds․ Reinstall the batteries, and the thermostat will revert to default settings․ This process resolves most software-related issues and restores original configuration․ Note that programmable schedules will be erased, requiring reconfiguration․ For detailed instructions, refer to the manual or contact Pro1 support for assistance․ This ensures optimal performance and troubleshooting effectiveness․

Maintenance and Care Tips

Regularly replace batteries with high-quality alkaline ones․ Clean the thermostat with a soft cloth․ Ensure proper installation and avoid direct sunlight exposure for optimal performance․

Best Practices for Long-Term Use

For optimal performance, replace batteries annually or when the low-battery indicator appears․ Clean the thermostat regularly with a soft cloth to prevent dust buildup․ Ensure proper installation by placing it 4-5 feet above the floor in an area with average temperature and good air circulation․ Avoid direct sunlight exposure to maintain accurate temperature readings․ Use the programmable features to save energy and enhance comfort․ Regular maintenance ensures long-term reliability and efficiency․

Replacing Batteries and Cleaning the Device

To ensure uninterrupted operation, replace the batteries annually or when the low-battery indicator appears․ Open the battery door, insert high-quality alkaline batteries correctly, and close the door securely․ For cleaning, use a soft, dry cloth to wipe the thermostat’s surface, avoiding harsh chemicals․ Regular cleaning prevents dust buildup and maintains accurate temperature readings․ Proper battery replacement and cleaning ensure optimal performance and extend the thermostat’s lifespan․ Refer to the manual for detailed instructions․

Warranty Information

Your Pro T705 Thermostat is backed by a 5-year limited warranty․ Registration is required within 60 days of installation to activate coverage․ Visit the Pro1 website․

Understanding the Warranty Coverage

The Pro T705 Thermostat’s 5-year limited warranty covers defects in materials and workmanship․ Registration within 60 days is mandatory for activation․ The warranty applies to the original purchaser and is non-transferable․ It excludes damage from improper installation, misuse, or unauthorized modifications․ For full details, refer to the warranty section in the manual or visit Pro1’s official website․

Registering Your Thermostat for Warranty

Registering your Pro T705 Thermostat is essential to activate the 5-year limited warranty; Visit Pro1’s official website at www․pro1iaq․com and complete the registration form․ You will need your thermostat’s model number, purchase date, and serial number․ Registration must be completed within 60 days of installation․ This ensures warranty validity and provides access to priority customer support․ Proper registration also helps Pro1 maintain accurate records for your device․

Technical Specifications

The Pro T705 Thermostat operates on high-quality alkaline batteries, supporting 4 programmable periods․ It uses 18-22 gauge wire and is compatible with most HVAC systems․

Key Features and Compatibility Details

The Pro T705 Thermostat offers programmable time periods, a backlit display, and compatibility with most HVAC systems․ It operates on alkaline batteries, supporting 4 programmable periods per day․ The device is designed for ease of use, with a glow-in-the-dark light button and a fan switch․ It is compatible with shielded or non-shielded 18-22 gauge thermostat wire․ The thermostat is shipped with an energy-saving pre-program and supports multiple heating and cooling stages․

Dimensional and Environmental Requirements

The Pro T705 Thermostat should be installed 4 to 5 feet above the floor in an area with average temperature and good air circulation․ It requires a location free from direct sunlight, moisture, or drafts․ The device operates on high-quality alkaline batteries and is designed for compatibility with most HVAC systems․ Environmental requirements include a stable indoor climate, avoiding extreme temperatures or humidity․ Proper placement ensures optimal performance and longevity of the thermostat․

The Pro T705 Thermostat offers efficient temperature control, ease of use, and a 5-year warranty, ensuring long-term comfort and energy savings for your home․

Final Tips for Optimal Performance

For optimal performance, replace batteries annually with high-quality alkaline ones․ Ensure the thermostat is installed 4-5 feet above the floor in an area with good air circulation․ Regularly clean the device to prevent dust buildup․ Check wiring connections to avoid issues․ Program schedules seasonally to maximize energy efficiency․ Refer to the manual for troubleshooting common problems․ By following these tips, you can enjoy consistent comfort and energy savings with your Pro T705 Thermostat․

Resources for Further Assistance

Visit Pro1 Technologies’ official website for downloadable PDF manuals․ Contact customer support at 888-776-1427 for personalized assistance․ The website also offers installation guides, troubleshooting tips, and warranty registration details․ Spanish manuals are available for Spanish-speaking users․ For technical issues, refer to the comprehensive troubleshooting section in the manual or explore the FAQ section on the Pro1 IAQ website․ Additional support resources include user forums and video tutorials․

Continue Reading

entry level bass instruction hurstville

Hurstville offers a vibrant environment for entry-level bass instruction, with expert teachers and comprehensive programs tailored for beginners․ Students can master foundational techniques and explore various musical styles effectively, fostering creativity and skill development in a supportive setting․

1․1 Overview of Bass Guitar Lessons for Beginners

Bass guitar lessons for beginners in Hurstville are designed to provide a comprehensive introduction to the instrument․ Students learn foundational techniques, basic music theory, and essential styles such as rock and jazz․ Lessons are structured to build confidence and creativity, with experienced instructors guiding learners through a progressive curriculum․ This supportive environment ensures beginners develop a strong musical foundation while exploring their passion for the bass guitar․

1․2 Importance of Starting with Professional Guidance

Professional guidance is crucial for entry-level bass players in Hurstville, as it ensures proper technique, avoids bad habits, and accelerates progress․ Experienced instructors provide personalized lessons tailored to each student’s needs, fostering a strong musical foundation․ Their expertise helps beginners stay motivated and inspired, making the learning journey enjoyable and effective from the very start․

Top Music Schools Offering Bass Lessons in Hurstville

Hurstville’s top music schools, including EPIC School of Music, Clavier Music & Art, and Arco Music Academy, offer comprehensive bass programs with experienced teachers, ensuring high-quality instruction for all levels․

2․1 EPIC School of Music – Comprehensive Bass Programs

EPIC School of Music in Hurstville provides tailored bass lessons, emphasizing foundational techniques and diverse musical styles․ With experienced teachers, students gain confidence and skill through structured, engaging instruction․ The school’s comprehensive approach ensures beginners build a strong musical base while advanced players refine their craft, all in a supportive and inspiring environment․

2․2 Clavier Music & Art – Specialised Music Instruction

Clavier Music & Art in Hurstville offers specialised bass guitar lessons tailored for entry-level students․ Their professional instructors provide structured programs, focusing on foundational techniques and musical exploration․ The school creates a supportive environment for teenagers and adults to learn and grow, ensuring a holistic music education experience in a central Hurstville location․

2․3 Arco Music Academy – Nurturing Future Musicians

Arco Music Academy in Hurstville provides a nurturing environment for future musicians, offering high-quality bass guitar lessons tailored for entry-level students․ Their expert instructors focus on foundational techniques, musical exploration, and skill development․ The academy caters to teenagers and adults, ensuring a supportive and inspiring space to learn and grow as a musician in Hurstville, Sydney․

Key Styles and Techniques Taught in Entry-Level Bass Lessons

Entry-level bass lessons in Hurstville focus on foundational techniques, introducing students to essential styles like jazz and rock․ Emphasis is placed on rhythm, timing, and versatility, providing a solid musical foundation tailored for beginners․

3․1 Foundation in Jazz and Rock Bass Playing

Entry-level bass lessons in Hurstville often begin with a foundation in jazz and rock styles․ These genres emphasize rhythm, timing, and versatility, essential for beginners․ Students learn core techniques like walking bass lines in jazz and driving rhythms in rock, providing a solid base for musical exploration and progression in their bass-playing journey․

3․2 Mastering Basic Techniques for Beginners

Beginners in Hurstville focus on mastering essential bass techniques, including proper hand positioning, finger placement, and plucking or picking styles․ Lessons emphasize simple scales, arpeggios, and rhythmic accuracy to build a strong foundation․ Students also explore basic grooves common in popular music, allowing them to apply their skills practically․ These fundamental exercises lay the groundwork for confident and expressive bass playing․

Qualities to Look for in a Bass Guitar Teacher

A skilled bass teacher should have experience teaching beginners, patience, and the ability to adapt to individual learning styles, ensuring a tailored and effective learning experience․

4․1 Experience in Teaching Beginners

Experienced teachers specialize in guiding beginners, offering structured lessons that build foundational skills; Their expertise ensures personalized attention, helping students progress confidently and enjoy the learning process from the start․

4․2 Ability to Adapt to Different Learning Styles

Teachers skilled in adapting instruction cater to individual learning preferences, ensuring each student progresses effectively․ Whether through visual, auditory, or hands-on methods, their flexibility fosters a supportive environment, enabling beginners to grasp concepts at their own pace and build confidence in their musical journey․

Benefits of Group vs․ Private Bass Lessons

Group lessons foster collaboration and dynamic learning, while private instruction offers tailored guidance․ Both options provide unique advantages, catering to different preferences and learning needs effectively for beginners․

5․1 Advantages of Private Instruction

Private bass lessons offer personalized attention, allowing teachers to tailor instruction to individual learning styles and progress․ This one-on-one format ensures focused development, addressing specific needs and pacing․ Students benefit from concentrated feedback, accelerating their technical and musical growth․ Private instruction also provides flexibility in scheduling and content, enabling beginners to build a strong foundation at their own pace, fostering confidence and creativity effectively․

5․2 Dynamics of Group Learning Environments

Group bass lessons in Hurstville create a collaborative and motivating atmosphere, fostering camaraderie among students․ Participants learn from one another, sharing ideas and techniques while building ensemble skills․ This dynamic environment encourages peer inspiration and healthy competition, helping beginners stay engaged․ Group sessions also provide opportunities for jamming and collective problem-solving, enhancing rhythmic accuracy and teamwork․ Additionally, group learning can be cost-effective while still offering structured guidance tailored to the class’s needs and progress, making it a social and productive way to develop musical skills together․

Performance and Rehearsal Opportunities in Hurstville

Hurstville provides numerous stages and rehearsal spaces for bass students to showcase their skills, fostering growth through live performances and collaborative musical experiences․

6․1 Joining Local Bands and Ensembles

Joining local bands and ensembles in Hurstville provides entry-level bass players with invaluable collaborative experiences․ These groups, often connected to music schools, offer rehearsals and performances, helping beginners build confidence and refine their skills in a dynamic, supportive environment tailored for all skill levels․

6․2 Participating in Music Workshops and Events

Participating in music workshops and events in Hurstville enhances entry-level bass learning․ Local schools like EPIC School of Music and Clavier Music & Art host masterclasses, jam sessions, and recitals․ These events provide opportunities to learn from experienced musicians, gain performance experience, and connect with fellow players, fostering growth and confidence in a vibrant musical community․

Rental Options and Instrument Availability

Hurstville offers convenient rental options for bass guitars, with local music schools like EPIC School of Music assisting beginners in finding the right instrument easily and affordably․

7․1 Renting a Bass Guitar for Beginners

Renting a bass guitar in Hurstville is a cost-effective option for beginners, allowing exploration of the instrument without upfront investment․ Local music schools like EPIC School of Music and Clavier Music & Art offer rental services or recommendations, ensuring access to quality instruments․ This flexibility is ideal for those unsure about long-term commitment, providing a practical way to start learning without financial strain․

7․2 Recommended Music Stores in Hurstville

EPIC School of Music and Clavier Music & Art are top recommendations for bass guitar rentals and purchases in Hurstville․ Both offer high-quality instruments and expert advice for beginners․ Additionally, Hurstville Guitar Lessons at 96 Queens Road and Arco Music Academy at 10 Park Road provide excellent options for bass enthusiasts, ensuring access to the right gear for a successful learning journey․

Success Stories from Hurstville Bass Students

Hurstville bass students have achieved remarkable success, progressing from beginners to confident performers․ Many have joined local bands and showcased their skills at community events, highlighting the region’s thriving music culture․

8․1 Testimonials from Entry-Level Bass Players

Entry-level bass players in Hurstville have shared inspiring testimonials about their learning journeys․ Many highlight the supportive environment, expert guidance, and rapid progress they’ve made․ Students praise the structured lessons, which have helped them transition from basics to performing confidently in local bands and events, fostering a lifelong passion for music and performance;

8․2 Achievements of Local Bass Guitarists

Local bass guitarists in Hurstville have achieved remarkable milestones, transitioning from entry-level students to accomplished performers․ Many have successfully joined bands, participated in music workshops, and showcased their skills in community events․ Some have even gained recognition in regional music competitions, demonstrating the effectiveness of Hurstville’s bass instruction programs in nurturing talent and fostering musical excellence․

Tips for Practicing Effectively as a Beginner

Set realistic goals, practice consistently, and use online resources to supplement lessons․ Focus on technique, timing, and building a strong musical foundation step-by-step daily․

9․1 Setting Realistic Goals and Schedules

Beginners should establish achievable goals and consistent practice schedules․ Start with short, focused sessions (20-30 minutes) and gradually increase duration․ Track progress weekly, celebrate small milestones, and stay motivated by integrating lessons from local Hurstville schools like EPIC School of Music or Clavier Music & Art, ensuring steady improvement and enjoyment of the learning process․

9․2 Using Online Resources to Supplement Lessons

Supplement your bass lessons with online resources like video tutorials, interactive tools, and apps․ Websites offer personalized learning paths, while YouTube channels provide diverse playing styles․ Use metronome apps to improve timing and theory guides to enhance understanding․ Schools like EPIC School of Music and Clavier Music & Art in Hurstville often recommend these tools to support structured learning and accelerate progress for entry-level bassists․

How to Enroll in Bass Lessons in Hurstville

To enroll, visit the official websites of music schools like EPIC School of Music or Clavier Music & Art․ Submit inquiry forms, call, or email to secure your spot․ Many schools offer a free first lesson to welcome beginners․

10․1 Step-by-Step Enrollment Process

Visit the music school’s website, such as EPIC School of Music or Clavier Music & Art․ Submit an inquiry form or contact via phone/email․ Schedule a free first lesson to discuss goals and expectations․ Bring your bass guitar or rent one locally․ Confirm enrollment by completing any necessary paperwork and securing your lesson slot․

10․2 Contact Information for Local Music Schools

EPIC School of Music: Suite 153, Building 1, Level 5, 10 Park Road, Hurstville NSW 2220․ Phone: 0466 799 831․ Email: info@epicschoolofmusic․com․ Clavier Music & Art: Suite 2, Level 1, 172 Forest Rd, Hurstville NSW 2220․ Phone: 0416 371 337 or (02) 9585 2713․ Email: info@clavier․com․au․ Arco Music Academy: Level 5, 10 Park Road, Hurstville NSW 2220․

Continue Reading

4 in 1 crib instructions manual

The 4-in-1 crib is a versatile, adaptable furniture solution designed to grow with your child, offering four functional configurations to meet their evolving needs. It transitions seamlessly from a crib to a toddler bed, daybed, and finally a full-size bed, ensuring long-term value and convenience. With a focus on safety, durability, and comfort, these cribs are crafted from high-quality, non-toxic materials, adhering to strict safety standards. The included manual provides detailed assembly instructions and essential safety guidelines, making it easy to set up and use responsibly. This crib is an excellent investment for parents seeking a practical, eco-friendly solution for their child’s sleeping needs.

Overview of the 4-in-1 Crib Features

The 4-in-1 crib is designed with versatility and practicality in mind, offering four distinct configurations: crib, toddler bed, daybed, and full-size bed. It features adjustable mattress height settings to accommodate growing children and ensure safety at every stage. Constructed from durable, eco-friendly materials, the crib is built to last, with a focus on non-toxic finishes and sturdy craftsmanship. Additional features include built-in storage drawers or shelves for organizing baby essentials, and smooth-gliding wheels for easy mobility. The crib also meets or exceeds all safety standards, ensuring a secure environment for your child.

Benefits of Using a 4-in-1 Crib

The 4-in-1 crib offers unparalleled convenience and value, adapting to your child’s needs from infancy to adulthood. Its multi-functional design eliminates the need for frequent furniture upgrades, saving time and money. With safety certifications like GREENGUARD GOLD, it ensures a non-toxic, eco-friendly environment. The crib’s durability and easy assembly make it a practical choice for busy parents. Additionally, its space-saving features and stylish designs complement any nursery decor. This crib is a long-term investment, providing comfort, safety, and versatility for years to come.

Safety Guidelines and Precautions

Always follow the assembly instructions and safety tips provided in the manual. Use the correct mattress size and avoid adding pillows or extra padding. Ensure all bolts and screws are tightly secured to prevent loose parts. Keep small parts out of reach of children to avoid choking hazards. Regularly inspect the crib for damage or wear. Never leave the crib unattended during assembly or use. Adhere to weight and age limits for each configuration.

General Safety Tips for Assembly and Use

Always read the manual carefully before starting assembly to ensure proper setup. Use only the tools and hardware provided to avoid damaging the crib. Check for any missing or damaged parts before assembly. Tighten all bolts and screws securely to prevent loose joints. Ensure the crib is placed on a firm, flat surface away from windows and curtains. Never add pillows, blankets, or padding inside the crib to avoid suffocation risks. Keep the surrounding area clear of toys or objects that could pose a tripping hazard. Regularly inspect the crib for wear or damage and address issues promptly.

Important Warnings and Cautions

Never use abrasive cleaners or window cleaners, as they may damage the crib’s finish or protective coating. Avoid adding pillows, comforters, or extra padding inside the crib to prevent suffocation risks. Ensure all fasteners are securely tightened to avoid loose parts that could trap clothing or body parts. Keep small hardware out of reach of children to prevent choking hazards. Only use mattresses that fit the specified dimensions (at least 51-5/8″ x 27-1/4″). Adult assembly is required, and proper setup is essential for safety. Regularly inspect for wear and tear.

Assembly Instructions

Begin by unfolding the crib frame and attaching the legs using the provided Allen key. Follow the diagrams to secure all bolts tightly. Next, attach the mattress support and ensure all hardware is properly aligned. Finally, double-check all connections for stability before placing the mattress inside. Always refer to the included manual for precise instructions and diagrams to ensure a safe and correct assembly process;

Preparing the Tools and Parts

Begin by gathering all tools and hardware included in the box, such as the Allen key, bolts, and screws. Organize the parts according to the parts list provided in the manual. Ensure all components are accounted for before starting assembly. Lay out the crib frame, mattress support, and legs on a flat, scratch-free surface. Verify that all hardware matches the specifications in the instructions. Store the assembly manual in the attached pouch for easy reference. Double-check that no parts are damaged or missing. This step ensures a smooth and efficient assembly process. Always follow the manual’s guidance for proper preparation.

Step-by-Step Assembly Process

Start by attaching the legs to the crib frame using the provided bolts. Ensure they are securely tightened. Next, unfold the bed frame and extend the legs until fully straight. Rotate the support arms and hook them onto the bolts at each corner. Use the Allen key to tighten all connections firmly. Refer to the diagrams for accurate alignment. Once the frame is stable, attach the mattress support and ensure it is level. Double-check all bolts for tightness. Follow the manual’s sequence to avoid missing any steps. Keep the instructions nearby for quick reference during assembly. This method ensures a sturdy and safe setup.

Organizing Hardware and Components

Begin by carefully unpacking and inventorying all hardware and components. Separate screws, bolts, and brackets, and match them to the parts list in the manual. Use the provided diagrams to identify each piece. Store small parts in labeled bags to prevent loss. Lay out larger components, such as the frame and mattress support, on a flat, scratch-free surface. Ensure all tools, like the Allen key, are within reach. Before starting assembly, double-check that no parts are missing or damaged. Organizing everything beforehand ensures a smooth and efficient assembly process.

Converting the Crib

The 4-in-1 crib offers seamless transitions from a crib to a toddler bed, daybed, and full-size bed, adapting to your child’s growth with ease and safety.

From Crib to Toddler Bed

Converting the crib to a toddler bed is a straightforward process that ensures your child’s safety and comfort as they grow. Begin by lowering the crib mattress to its lowest position to prepare for the transition. Remove the front rail and replace it with the toddler bed rail, which is typically provided in the hardware kit. Ensure all bolts and screws are securely tightened to maintain stability. The toddler bed configuration allows your child to enter and exit the bed independently while still providing a safe sleeping environment. Always follow the manual’s specific instructions for this conversion to avoid any structural issues. Regularly check the bed’s frame and rails for loose parts and tighten them as needed. Never add pillows or extra padding under the mattress, as this can pose a safety hazard. By following these steps, you can create a cozy and secure toddler bed for your child to enjoy.

From Toddler Bed to Daybed

Transitioning from a toddler bed to a daybed enhances your child’s sleeping experience by offering a more spacious and comfortable option. Start by ensuring the mattress is at the correct height, typically the lowest setting for a daybed configuration. Remove any remaining toddler bed rails and attach the daybed side panels or frame, following the manufacturer’s instructions. Tighten all bolts and screws securely to maintain stability; The daybed setup provides a larger sleeping area while maintaining safety and support. Regularly inspect the frame for any loose parts and ensure the mattress fits snugly within the frame. This conversion is ideal for older toddlers and young children who need more room to move comfortably. Always refer to the manual for specific guidance on this transition to ensure everything is assembled correctly and safely.

From Daybed to Full-Size Bed

Converting your daybed to a full-size bed is a straightforward process that provides a spacious sleeping solution for older children and teenagers. Begin by removing any existing daybed side panels or rails and attach the full-size bed frame components, following the manual’s instructions. Ensure the mattress support system is properly adjusted to accommodate a standard full-size mattress. Secure all bolts and screws tightly to ensure stability and safety. This final configuration offers a comfortable and durable sleeping environment. Always double-check for loose parts and ensure the mattress fits securely within the frame. Refer to the manual for specific guidance on this conversion to guarantee a safe and proper setup.

Maintenance and Cleaning

Regular cleaning involves using a damp cloth without harsh chemicals. Inspect hardware regularly and tighten loose parts. Avoid abrasive cleaners to maintain the finish and ensure durability.

Cleaning the Crib Surface

Regular cleaning is essential for maintaining hygiene and safety. Use a soft, damp cloth to wipe down the crib’s surfaces, avoiding harsh chemicals or abrasive cleaners. Never use window cleaners or strong detergents, as they may damage the finish or protective coatings. For stubborn stains, dilute a mild soap with water and gently scrub the area. Ensure the crib is completely dry after cleaning to prevent moisture buildup. Avoid using bleach or acidic solutions, as they can harm the materials. Cleaning regularly helps maintain the crib’s durability and ensures a safe environment for your child.

Maintaining the Crib’s Durability

To ensure the crib remains durable, regularly inspect all hardware and connections for looseness and tighten as needed. Avoid exposing the crib to excessive moisture, as it can damage the materials. Never overload the crib with additional weight beyond its designed capacity. Store the crib in a dry, cool place when not in use. Use only the recommended mattress size to maintain proper fit and support. By following these practices, you can extend the lifespan of the crib and ensure it remains a safe and sturdy piece of furniture for years to come.

Troubleshooting Common Issues

If you encounter issues during assembly or use, check for loose connections or missing hardware. Ensure all bolts and screws are tightly secured. For wobbling, verify that all legs are evenly positioned and the floor is level. If parts are damaged or missing, contact the manufacturer for replacements. Do not proceed with assembly if any components are compromised. For scratches or marks, avoid harsh chemicals and use a damp cloth for cleaning. If the crib creaks, apply a small amount of silicone-based lubricant to moving parts. Always refer to the manual for guidance on resolving specific problems.

Warranty and Manufacturer Support

Your 4-in-1 crib is backed by a comprehensive manufacturer warranty, ensuring coverage for defects in materials and workmanship. Register your product to activate the warranty and enjoy peace of mind. For assistance, contact the manufacturer’s customer support team via phone or email, as detailed in the manual. Do not return the crib to the retailer without prior authorization. The warranty does not cover damage caused by improper assembly or misuse. Refer to the warranty section in your manual for specific terms and conditions. Manufacturer support is available to address any concerns or provide replacement parts if needed.

Parts List and Hardware Requirements

Your 4-in-1 crib includes a detailed parts list in the manual, ensuring all components are accounted for before assembly. Typical hardware includes bolts, screws, and an Allen key, with specific quantities listed to avoid shortages. Additional tools like a screwdriver may be required. Verify all parts are present and undamaged before starting. Do not substitute hardware with alternative parts, as this may compromise safety and functionality. If any items are missing or damaged, contact the manufacturer for replacements. Organize hardware by type and size to streamline the assembly process. Refer to the manual for diagrams and part descriptions to ensure accuracy. Proper organization and verification of parts are critical for a secure and efficient setup.

Tools Needed for Assembly

For assembling your 4-in-1 crib, you’ll need an Allen key (usually provided) and a screwdriver for driving screws. Additional tools like a wrench or pliers may be required for securing bolts. Ensure all tools are readily available to streamline the process. Refer to the manual for specific tool recommendations, as requirements may vary slightly by model. A rubber mallet can be helpful for gently tapping parts into place without causing damage. Organize your tools beforehand to avoid delays. If any tools are missing, consider having backups on hand to complete the assembly efficiently and safely. Proper tools ensure a secure and correct setup.

Continue Reading

hat size guide

Discover the essential guide to hat sizes‚ ensuring comfort‚ style‚ and the perfect fit. Learn how to measure your head‚ interpret size charts‚ and choose the right hat for your needs.

Importance of Proper Hat Fit

A proper hat fit is crucial for both comfort and style. A well-fitting hat ensures even weight distribution‚ preventing discomfort or irritation. It also enhances the overall appearance‚ making the hat look balanced on your head. A hat that’s too tight can cause discomfort‚ while one that’s too loose may shift or fall off. Achieving the right fit guarantees a seamless blend of practicality and fashion.

Understanding the importance of proper fit helps you avoid common issues like hats that slip or feel restrictive. This ensures your hat stays in place and complements your look effortlessly‚ making every wear a confident and enjoyable experience.

How to Measure Your Head for the Right Hat Size

Use a soft tape measure to wrap around your head just above your eyebrows and ears. Ensure the tape is straight for an accurate measurement.

Step 1: Use a Soft Measuring Tape

Begin by using a soft‚ flexible measuring tape to ensure accuracy and comfort. If you don’t have a tape measure‚ a piece of string or ribbon can work as an alternative. Wrap the tape or string around your head‚ positioning it just above your eyebrows and ears‚ where the hat will naturally sit. This ensures the measurement reflects how the hat will fit. Keep the tape straight and level to avoid any distortion in the measurement. This step is crucial for obtaining an accurate head circumference‚ which is essential for determining your correct hat size.

Step 2: Measure Head Circumference

Wrap the soft measuring tape around your head‚ positioning it just above your eyebrows and ears‚ where the hat will sit naturally. Ensure the tape is level and not twisted for an accurate measurement. The tape should feel snug but not overly tight or loose. Take note of the circumference in inches or centimeters. This measurement is crucial for determining your hat size accurately. For consistency‚ repeat the process a few times and use the average to ensure precision. This step sets the foundation for finding your perfect fit.

Step 3: Determine Hat Size Using a Chart

Once you have your head circumference measurement‚ consult a hat size chart to find your corresponding size. Align your measurement in inches or centimeters with the chart to identify your hat size. Standard sizes range from 6 7/8 to 8 and beyond‚ with variations for men‚ women‚ and kids. US‚ UK‚ and French sizes may differ‚ so ensure you’re using the correct chart for your region. Double-check the measurements to confirm accuracy‚ as sizes can vary slightly between brands; This step ensures you select a hat that fits comfortably and looks great.

Understanding Hat Size Charts

Hat size charts convert head measurements into standardized sizes‚ ensuring proper fit. They vary by region‚ with US‚ UK‚ and French sizes offering different measurements for accuracy.

US‚ UK‚ and French Size Conversions

Understanding size conversions is crucial for international shoppers. US‚ UK‚ and French hat sizes differ slightly‚ with each region having its own measurement standards. For example‚ a US size 7 is equivalent to a UK size 6.5 and a French size 55. To ensure accuracy‚ measure your head circumference and compare it to a conversion chart. This allows for seamless transitions between sizing systems‚ whether shopping domestically or internationally. Knowing these conversions eliminates guesswork and guarantees the perfect fit‚ regardless of the region’s sizing standards.

Interpreting Measurements for Men‚ Women‚ and Kids

Measurements for hats vary across men‚ women‚ and children due to differences in average head sizes. Men typically have larger head circumferences‚ ranging from 21–25 inches‚ while women’s sizes are slightly smaller‚ around 20–23 inches. Kids’ sizes are further divided into age groups‚ with toddler sizes starting at 18 inches and increasing as children grow. Use a size chart to match measurements to corresponding hat sizes‚ ensuring a comfortable and proper fit for all. Accurate sizing is key to enjoying your hat comfortably and stylishly.

Factors Affecting Hat Fit

Head shape‚ hat style‚ and material impact fit. Seasonal factors like thickness and breathability also matter‚ ensuring comfort and style are balanced for every occasion.

Head Shape and Hat Style Compatibility

Matching your hat style to your head shape ensures a flattering and comfortable fit. Oval-shaped heads suit most styles‚ while round faces benefit from angular or tall hats. Square-shaped heads look best with soft‚ rounded styles‚ and heart-shaped faces are complemented by wide-brimmed hats. Understanding your head shape helps narrow down hat styles that enhance your features and provide a balanced look. This compatibility ensures both comfort and a stylish appearance‚ making your hat a perfect accessory for any occasion.

Material and Seasonal Considerations

Choosing the right hat material is crucial for comfort and durability‚ varying with seasonal needs. Summer hats often feature breathable fabrics like cotton or straw‚ while winter styles use wool or fleece for warmth. The material affects fit and comfort‚ with stretchy fabrics like elasticized cotton providing flexibility. Seasonal hats also cater to specific activities‚ such as water-resistant materials for rainy weather or lightweight options for outdoor sports. Selecting the appropriate material ensures your hat remains comfortable and functional throughout the year‚ regardless of the season or occasion.

Choosing the Right Hat Style

Find the perfect hat style by considering face shape‚ personal taste‚ and occasion. From fedoras to beanies‚ the right style enhances your look and complements your features.

Face Shape and Hat Style Matching

Matching your hat style to your face shape ensures a balanced‚ polished look. Oval faces suit most styles‚ while round faces benefit from angular hats like fedoras. Square faces soften with rounded silhouettes‚ and heart-shaped faces balance with wider brims. Consider proportions and personal style to enhance your features and confidence. The right hat complements your face shape‚ creating a harmonious and stylish appearance. Use this guide to find the perfect match for your unique features and elevate your wardrobe effortlessly.

Popular Hat Styles and Their Fits

Explore popular hat styles and their unique fits to find your perfect match. Fedora hats feature indented crowns and wide brims for a sophisticated look. Beanies are close-fitting and versatile‚ ideal for casual wear. Baseball caps offer a sporty vibe with adjustable straps. Panama hats are lightweight and breathable‚ perfect for summer. Each style has distinct fit characteristics‚ from snug to relaxed. Consider your head size‚ face shape‚ and personal preference when selecting a hat. The right style enhances your look while ensuring comfort and confidence.

Tips for Ensuring the Perfect Fit

Ensure a perfect fit by trying hats on correctly‚ placing them above your eyebrows. Adjust straps or bands for comfort‚ and choose styles that suit your head shape.

How to Try On Hats Correctly

To try on hats correctly‚ stand in front of a mirror and gently place the hat on your head. Position it so the band sits just above your eyebrows and ears‚ ensuring it’s level. Avoid pulling the hat too tight or leaving it too loose. Use a mirror to check the fit from all angles‚ ensuring the hat sits comfortably and aligns with your face shape. If adjustable‚ tighten or loosen the band for a secure‚ comfortable fit. Gently tug the hat to ensure it stays in place without shifting.

Adjusting Hats for Comfort

Ensure your hat fits comfortably by adjusting it to sit securely without tightness. For hats with adjustable bands‚ tighten or loosen them to achieve the perfect fit. Hats with Velcro or elastic straps allow for precise adjustments. If your hat has a chin strap‚ use it to secure the fit‚ especially in windy conditions. Avoid over-tightening‚ as it may cause discomfort or leave marks. Adjustable hats with soft interior bands provide extra comfort and prevent irritation. Always check the fit by gently tugging the hat to ensure it stays in place without shifting.

Common Hat Size Questions Answered

Address common questions about hat sizing‚ ensuring a comfortable and stylish fit. Learn how to measure accurately‚ convert sizes‚ and solve frequent issues like tightness or looseness.

Average Hat Sizes for Men and Women

For men‚ average hat sizes range from 7 to 7 3/8‚ while women’s sizes typically fall between 6 3/4 and 7 1/8. These measurements vary based on head shape and style preferences. Men’s sizes generally align with larger circumferences‚ reflecting average head sizes‚ while women’s hats are slightly smaller. Understanding these averages helps in selecting the right fit‚ ensuring comfort and a flattering appearance. Always refer to a size chart for precise measurements‚ as sizes can differ slightly between brands and styles.

Solving Common Fit Issues

Common hat fit issues include hats that are too tight‚ too loose‚ or misaligned. To resolve these‚ ensure accurate head measurements and consult a size chart. If a hat feels tight‚ consider a larger size or adjustable features like elastic bands. For loose fits‚ opt for a smaller size or use hat grips. Proper positioning is key—align the hat above the eyebrows and ears. Material choice also affects fit; breathable fabrics like cotton are ideal for comfort. Addressing these issues ensures a secure‚ comfortable‚ and stylish wear.

With accurate measurements and proper fit‚ you can confidently choose the perfect hat. This guide ensures comfort‚ style‚ and the ideal fit for every occasion.

Final Thoughts on Achieving the Perfect Hat Fit

Achieving the perfect hat fit combines accurate measurements‚ understanding size charts‚ and considering personal style. Ensure comfort by choosing the right material and design for your needs. Proper fit enhances both appearance and comfort‚ making your hat a seamless addition to any outfit. By following this guide‚ you can confidently select hats that flatter your head shape and complement your wardrobe. Remember‚ the right fit is key to enjoying your hat for years to come.

Continue Reading

wow sod blacksmithing guide

Welcome to our comprehensive WoW Season of Discovery Blacksmithing Guide! This guide provides a detailed path to mastering Blacksmithing, from leveling to crafting epic gear and maximizing gold-making opportunities in SoD.

Overview of Blacksmithing in WoW Season of Discovery

Blacksmithing in WoW Season of Discovery is a vital profession that allows players to craft powerful weapons, armor, and other essential items. With each phase introducing new recipes and reagents, Blacksmithing remains a cornerstone for both raiding and PvP gear. The profession is divided into specializations like Weaponsmithing and Armorsmithing, offering unique benefits. As you progress, you’ll unlock high-demand items for the Auction House, making it a lucrative skill for gold-making. This guide covers everything from leveling to mastering the latest SoD content, ensuring you stay ahead in crafting and profiting.

Importance of Blacksmithing for Crafting and Gold-Making

Blacksmithing is essential for crafting high-demand gear in WoW Season of Discovery, making it a cornerstone for both raiding and PvP success. By mastering this profession, players can create epic weapons and armor, sought after by top-tier raiders and arena competitors. Additionally, Blacksmithing offers significant gold-making opportunities through the Auction House. Crafting in-demand items like raid gear and specialized equipment allows players to capitalize on market needs, ensuring consistent profit. This dual benefit of crafting power and generating wealth makes Blacksmithing a highly valuable profession in SoD.

Blacksmithing Trainers and Locations

Blacksmithing trainers are found in major cities like Stormwind and Orgrimmar, offering skill progression. Some specialized trainers are located in instances, such as Gnomeregan, for advanced recipes.

Where to Find Blacksmithing Trainers in SoD

Blacksmithing trainers are located in major cities and some instances. In Alliance cities like Stormwind, Ironforge, and Darnassus, trainers are near the blacksmithing shops. For Horde, trainers are in Orgrimmar, Undercity, and Thunder Bluff. Additionally, some advanced trainers can be found in dungeons such as Gnomeregan, offering specialized recipes and skill progression. These trainers are essential for unlocking higher-level blacksmithing techniques and recipes.

Trainer Locations and Requirements

Blacksmithing trainers are found in major cities and faction-specific areas. In Stormwind, the trainer is near the blacksmithing shop in the Trade District. Orgrimmar’s trainer is in the Valley of Strength. Other trainers are located in Ironforge, Undercity, and Darnassus. Requirements include reaching level 26 for Expert Blacksmithing and level 41 for Artisan. Some advanced trainers in instances like Gnomeregan require specific quests or reputation levels. Ensure you meet these requirements before seeking them out to unlock higher skill levels and specialized recipes.

Blacksmithing Leveling Guide (1-300)

This guide provides a comprehensive structured path to leveling Blacksmithing from 1 to 300, focusing on efficiency and cost-effectiveness across three phases, ensuring a smooth progression.

Phase 1: Leveling Blacksmithing from 1-200

Phase 1 focuses on establishing a strong foundation in Blacksmithing, starting from skill level 1 up to 200. During this phase, you’ll craft essential items like Rough Bronze Leggings and Green Iron Boots, which are not only cost-effective but also provide consistent skill-ups. Recipes such as the Coarse Sharpening Stone and Rough Whetstone are highly recommended for early progression. Utilizing materials like copper ore and tin ore ensures a steady supply of reagents. Additionally, crafting items like the Bronze Battle Axe can help meet early-game demands for weapons, making this phase both efficient and profitable.

Phase 2: Leveling Blacksmithing from 200-225

Phase 2 of the Blacksmithing guide focuses on advancing your skill from 200 to 225, introducing new recipes and materials. This phase emphasizes crafting items like Mithril Chain Pants and Mithril Plate Boots, which provide consistent skill-ups and are in demand for raid and PvP gear. Utilizing mithril ore and other phase-specific reagents ensures efficiency. Crafting weapons like the Mithril crusher becomes viable, offering both skill progression and gold-making opportunities. This phase is crucial for preparing for higher-level crafting while maintaining profitability through in-demand items for Gnomeregan raids and other endgame activities.

Phase 3: Leveling Blacksmithing from 225-300

Phase 3 focuses on mastering Blacksmithing from 225 to 300, introducing high-tier recipes and rare materials like Arcane Crystal and Enchanted Leather. Crafting items such as the Nightforge Belt and Belt of the Tempest provides consistent skill-ups and access to epic gear. This phase prioritizes efficiency, using patterns like the Scepter of Light for quick progression. With the skill cap raised, Phase 3 emphasizes crafting raid-ready items and high-demand gear for the Auction House. Mastering this phase unlocks the ability to craft powerful endgame equipment, making it a critical step for both raiders and gold-makers in WoW Season of Discovery.

Blacksmithing Specializations

Blacksmithing offers two specializations: Weaponsmith and Armorsmith. Each path provides unique benefits, such as crafting powerful weapons or durable armor, catering to different playstyles and needs in WoW SoD.

Weaponsmith vs. Armorsmith: Choosing the Right Specialization

Choosing between Weaponsmith and Armorsmith depends on your playstyle and goals. Weaponsmiths excel at crafting powerful weapons, ideal for dealing damage in raids and PvP. Armorsmiths focus on creating durable armor, benefiting tanks and players needing survivability. Consider your class role and the demand on the Auction House. Weaponsmiths can capitalize on high demand for raid gear, while Armorsmiths cater to players seeking upgraded defensive equipment. Both specializations require specific recipes and materials, so plan accordingly to maximize your crafting efficiency and profitability.

Benefits and Differences of Each Specialization

Weaponsmithing focuses on crafting weapons like swords and axes, offering high demand for raid and PvP gear; Armorsmithing specializes in plate armor, ideal for tanks and survivability-focused classes. Weaponsmiths benefit from consistent demand for weapon upgrades, while Armorsmiths cater to players needing durable armor. Both specializations require unique patterns and materials, but they diverge in market appeal. Weaponsmiths often see higher gold-making potential due to raid gear demand, whereas Armorsmiths provide essential items for leveling and tanking roles. Choose based on your playstyle and market trends to maximize your crafting impact and profitability in Season of Discovery.

Important Recipes and Items in SoD

Key recipes in Season of Discovery include raid-ready gear, PvP weapons, and high-demand items for the Auction House, essential for both progression and gold-making strategies.

Key Recipes for Raiding and PvP Gear

In Season of Discovery, Blacksmithing excels at crafting essential gear for raiding and PvP. Recipes include powerful weapons like epic swords and maces, as well as armor sets tailored for specific classes. These items are highly sought after for their performance in high-level content and competitive play. Crafting these requires rare materials and patterns unlocked in later phases. Players focusing on raiding or PvP should prioritize these recipes, as they offer significant advantages. Additionally, these items are in high demand on the Auction House, making them a lucrative choice for gold-making. Mastering these recipes is crucial for both progression and profit.

High-Demand Items for the Auction House

Blacksmithing offers lucrative opportunities for crafting high-demand items in Season of Discovery. Players seek epic weapons, armor, and gear enhancements for raids and PvP. Rare materials and patterns unlocked in later phases enable crafting of sought-after items. These high-ticket goods are essential for progression and competition, making them highly profitable on the Auction House. By focusing on these in-demand crafts, blacksmiths can capitalize on market needs, ensuring consistent gold income. Staying attuned to market trends and crafting prioritized items maximizes profitability, making Blacksmithing a valuable profession for both progression and wealth-building in WoW Season of Discovery.

New Recipes and Reagents in Season of Discovery

Season of Discovery introduces phase-specific recipes and reagents, expanding Blacksmithing possibilities. New patterns for powerful gear emerge in each phase, requiring unique materials for crafting.

Phase-Specific Recipes and Materials

In Season of Discovery, each phase unlocks new Blacksmithing recipes tailored to current content. Phase 1 introduces foundational items for early leveling, while Phase 2 expands into expert-level gear. Phase 3 brings raid-ready equipment and PvP-oriented craftables. Materials like Dark Iron and Enchanted Thorium become essential for high-end recipes. Crafters must adapt by gathering phase-specific reagents and monitoring Auction House demand. Staying updated on phase-exclusive patterns ensures maximum crafting efficiency and gold-making potential. Regularly checking for new recipes and required materials is crucial for staying competitive in SoD’s evolving economy.

How to Obtain New Reagents and Patterns

In Season of Discovery, new Blacksmithing reagents and patterns are introduced in each phase. These are often obtained through dungeon drops, raid loot, or crafted by other professions like Alchemy or Enchanting. Rare materials such as Dark Iron Ore or Enchanted Thorium are essential for high-end recipes. Players can also acquire patterns from vendors or profession-specific quests. Monitoring phase updates and adapting to new crafting requirements ensures access to cutting-edge recipes. Regularly checking the Auction House for rare materials and staying updated on patch notes helps Blacksmiths stay ahead in crafting high-demand items for raids, PvP, and profit.

Gold-Making Tips with Blacksmithing

Maximize your gold-making potential with Blacksmithing by crafting high-demand items like raid gear and PvP equipment. Monitor Auction House trends and optimize your crafting to ensure maximum profit.

Identifying High-Demand Items on the Auction House

To maximize profits, focus on crafting items in high demand, such as raid gear and PvP equipment. These items are essential for players progressing through content in SoD. Use the Auction House to monitor current trends and prices. Keep an eye on which items are frequently purchased and restock them. Crafting these in-demand items will not only meet player needs but also ensure steady gold income. Regularly updating your inventory based on market demand is key to successful gold-making with Blacksmithing.

Optimizing Crafting for Maximum Profit

To optimize crafting for maximum profit, focus on creating items with high demand and low competition. Use materials efficiently by crafting in bulk during off-peak hours when the Auction House is less crowded. Consider crafting gear that aligns with current content phases, such as raid or PvP items. Additionally, prioritize recipes that yield multiple items, reducing material waste. Track your production costs and ensure you’re pricing competitively. Specializing in niche items, like high-end weapons or armor, can also yield higher margins and attract serious buyers.

Mastering Blacksmithing in WoW SoD requires skill, strategy, and dedication. This guide has equipped you with the tools to excel in crafting and gold-making; Happy forging!

Final Thoughts on Mastering Blacksmithing in SoD

Mastering Blacksmithing in WoW Season of Discovery is a rewarding journey that combines skill progression, crafting, and strategic planning. By following this guide, you’ve gained insights into leveling, specializations, and gold-making strategies. Staying updated with new recipes and phases is key to maintaining a competitive edge. Whether crafting for raids, PvP, or the Auction House, dedication and adaptability will ensure your success. Keep experimenting, stay resourceful, and embrace the evolution of your Blacksmithing prowess in SoD.

  • Stay informed about phase-specific updates.
  • Optimize crafting for maximum profit.
  • Enjoy the creative freedom of Blacksmithing.
Continue Reading

high school cross country training plan pdf

A well-structured high school cross country training plan is essential for building endurance, speed, and overall performance, ensuring athletes are prepared for the competitive season ahead.

1.1 Importance of Consistent Summer Miles

Consistent summer miles are the foundation of a successful high school cross country season. Building a strong aerobic base during the off-season ensures athletes develop the endurance needed for competition. Coaches emphasize that summer training establishes a rhythm, allowing runners to gradually increase mileage and intensity. This period is critical for preventing injuries, as sudden spikes in workload can lead to overtraining. A well-structured summer program focuses on progressive overload, where athletes slowly build weekly mileage by 10% to adapt to the demands. This approach not only enhances physical fitness but also mental toughness, preparing athletes for the rigorous schedule ahead. By prioritizing consistent summer miles, runners create a solid platform for speed and endurance work during the formal season.

1.2 Overview of the Training Plan Structure

The training plan is divided into phases, starting with building endurance and progressing to more intense workouts. It follows a linear-periodization approach, categorizing workouts into phases such as stamina, strength, speed, integration, and taper. Each phase focuses on specific goals, ensuring a balanced development of endurance and speed. The plan begins with consistent summer miles to establish a strong aerobic base and gradually increases mileage by 10% weekly. It incorporates speed work, hill repeats, and core exercises to enhance performance. Recovery weeks are included to allow athletes to adapt and prevent overtraining. The structure emphasizes progressive overload, ensuring athletes are prepared for the competitive season. By integrating cross-training and nutrition advice, the plan provides a holistic approach to maximize performance and reduce injury risks.

Phases of Training

The training is divided into key phases: stamina, strength, speed, integration, and taper. Each phase progressively builds endurance, speed, and race readiness.

2.1 Pre-Season Training: Building Endurance

The pre-season phase focuses on establishing a strong aerobic base through consistent mileage and long runs. Athletes start with a 20-mile week, gradually increasing by 10% each week to avoid injury. This period emphasizes slow, steady runs to build stamina and endurance. Cross-training, such as cycling or swimming, is incorporated to reduce impact while maintaining fitness. Recovery weeks are essential, with mileage decreased by 10% to allow the body to adapt. The goal is to create a foundation of endurance that will support more intense training in later phases. Consistency during the summer months is critical for long-term success in the cross-country season.

2.2 In-Season Training: Balancing Speed and Endurance

In-season training focuses on refining both speed and endurance to prepare athletes for competition. Workouts include interval training, tempo runs, and hill repeats to enhance cardiovascular fitness and muscular strength. Long runs are maintained but at a reduced frequency to preserve energy for race-specific efforts; Recovery weeks are integrated, with mileage decreased by 10% to prevent overtraining. Cross-training, such as swimming or cycling, is continued to maintain fitness without excessive impact. The goal is to peak at the right time, ensuring athletes are fresh and ready for key meets. This balance of intensity and recovery helps maximize performance while minimizing the risk of injury during the competitive season.

Weekly Mileage and Progression

Begin with a 20-mile week, gradually increasing by 10% weekly to build endurance. Incorporate recovery weeks, reducing mileage to prevent overtraining and ensure optimal progression.

3.1 Starting with a 20-Mile Week

Beginners and returning athletes alike start with a manageable 20-mile week, spread over five running days with one day reserved for cross-training. This baseline allows athletes to adapt to the demands of consistent training while minimizing the risk of injury. The mileage is distributed to ensure gradual adaptation, with long runs forming the foundation for endurance. Coaches emphasize the importance of consistency, as summer miles lay the groundwork for a successful season. This initial phase focuses on building a aerobic base, with runs performed at a conversational pace to promote recovery and progress. The 20-mile week is the starting point, with incremental increases planned for the following weeks to ensure steady improvement.

3.2 Gradually Increasing Mileage by 10% Weekly

After establishing a base of 20 miles, weekly mileage is increased by no more than 10% to allow for proper adaptation and reduce injury risk. This gradual progression ensures athletes build endurance without overexertion. For example, if an athlete runs 20 miles one week, the next week’s mileage should not exceed 22 miles. This approach prevents sudden spikes in training load, which can lead to overtraining or burnout. Coaches monitor progress closely, adjusting the plan as needed to accommodate individual thresholds. Recovery weeks, incorporated every 3-4 weeks, involve a 10% reduction in mileage to promote healing and long-term consistency. This structured, incremental increase aligns with the season’s goals, ensuring peak performance during key competitions.

Key Workouts and Drills

Essential workouts include speed intervals, hill repeats, and strides to enhance endurance, strength, and speed. Drills like high knees and butt kicks improve form and agility.

4.1 Speed Work: Intervals and Strides

Speed work, including intervals and strides, is crucial for improving race pace and endurance. Intervals involve repetitive short-distance runs at high intensity, followed by recovery periods. Strides are shorter, faster efforts that enhance running efficiency and speed. These workouts help athletes build cardiovascular strength, muscular endurance, and mental toughness. Coaches often structure interval sessions on tracks or measured courses, while strides are typically incorporated after easy runs. Proper pacing and recovery between efforts ensure athletes maximize benefits without overtraining. Consistency in speed work directly translates to faster race times and improved overall performance during the cross country season.

4.2 Strength Training: Hills and Core Exercises

Strength training, particularly through hill repeats and core exercises, is vital for building power, endurance, and injury resilience. Hill repeats target the legs and glutes, improving explosive power and running efficiency. Athletes sprint uphill at maximum effort for 30-90 seconds, then recover by walking or jogging downhill. Core exercises, such as planks, sit-ups, and Russian twists, strengthen the abdominal and lower back muscles, enhancing stability and posture during runs. These workouts complement endurance training by addressing muscle imbalances and boosting overall athleticism. Incorporating strength training twice a week helps athletes maintain proper form, generate more force with each stride, and perform at higher intensities during races. A strong core and powerful legs are essential for conquering challenging courses and maintaining consistency throughout the season.

Cross-Training and Recovery

Cross-training and recovery are crucial for preventing injuries and enhancing endurance. Activities like biking, swimming, or using an elliptical reduce stress on joints while maintaining fitness. Recovery weeks, incorporating rest or low-intensity workouts, allow the body to heal and adapt, ensuring long-term progress and peak performance during the season.

5.1 Incorporating Cross-Training Days

Incorporating cross-training days into a high school cross country training plan is vital for reducing the risk of overuse injuries and enhancing overall fitness. Activities such as cycling, swimming, or using an elliptical machine are excellent alternatives to running, as they maintain cardiovascular fitness without the repetitive impact on joints. These sessions should be moderate in intensity and last between 30 to 45 minutes. Cross-training days also provide mental variety, preventing burnout and keeping athletes motivated. Coaches often recommend one cross-training day per week, especially during high-mileage phases, to allow runners to recover while still improving endurance. This balanced approach ensures athletes stay healthy and perform at their best during the competitive season.

5.2 Importance of Recovery Weeks

Recovery weeks are a critical component of a high school cross country training plan, allowing athletes to recharge and adapt after periods of intense training. These weeks typically involve a reduction in mileage and intensity, often by 10%, to prevent overtraining and reduce the risk of injury. During recovery weeks, athletes may engage in light running, cross-training, or complete rest to promote physical and mental rejuvenation. This strategic decrease in workload helps the body repair and strengthen, ensuring athletes return to training with improved endurance and performance. Recovery weeks are essential for long-term progress, as they balance the demands of consistent training and prevent burnout, ultimately leading to peak performance during the competitive season.

Nutrition and Injury Prevention

Proper nutrition and hydration are vital for optimal performance and injury prevention in cross country training. A balanced diet rich in carbs, proteins, and fats fuels recovery and energy. Avoiding overtraining through adequate rest and listening to the body is crucial to prevent injuries and maintain long-term health.

6.1 Fueling for Optimal Performance

Fueling for optimal performance is critical for high school cross country athletes. A balanced diet rich in carbohydrates, proteins, and healthy fats provides the necessary energy for training and recovery. Carbohydrates are the primary energy source, while proteins aid in muscle repair and growth. Healthy fats support overall health and hormone production. Hydration is equally important, with water and electrolyte-rich beverages essential for maintaining performance and preventing dehydration. Meals should be timed appropriately, with a pre-workout snack or meal 1-3 hours before training and a post-workout meal within 30-60 minutes to replenish glycogen stores and promote recovery; Avoiding excessive sugar and processed foods helps maintain consistent energy levels and overall health. A well-planned nutrition strategy ensures athletes perform at their best and supports long-term development.

6.2 Strategies to Avoid Overtraining and Injuries

Avoiding overtraining and injuries is crucial for maintaining consistency in high school cross country training. Coaches and athletes should emphasize proper recovery, including rest days and cross-training, to prevent overuse injuries. Gradually increasing mileage and intensity helps the body adapt without excessive strain. Incorporating strength training, such as core and hill workouts, improves resilience and reduces injury risk. Monitoring for signs of overtraining, like persistent fatigue or muscle soreness, is essential for early intervention. Ensuring adequate sleep, hydration, and nutrition supports overall recovery. Additionally, incorporating dynamic warm-ups and cool-downs can enhance flexibility and reduce the likelihood of muscle strains. By balancing training intensity with recovery, athletes can maintain peak performance while minimizing the risk of injury.

Continue Reading

filetype:pdf last night at the viper room

Gavin Edwards’ Last Night at the Viper Room explores the life of River Phoenix, set against the backdrop of Hollywood’s iconic Viper Room nightclub.

The book delves into the tragic events of October 31, 1993, offering a detailed account of Phoenix’s final night and the circumstances surrounding his untimely death.

Blending biography and cultural history, it captures the essence of a pivotal moment in Hollywood’s history, shedding light on Phoenix’s rise to fame and enduring legacy.

1.1 Overview of the Book

Last Night at the Viper Room by Gavin Edwards is a compelling biography that examines the life and tragic death of River Phoenix, set against the backdrop of Hollywood’s iconic Viper Room nightclub.

The book provides a detailed account of Phoenix’s meteoric rise to fame, his notable roles, and the circumstances surrounding his untimely death on October 31, 1993.

Edwards blends personal biography with cultural history, offering insights into the Viper Room’s significance and its connection to Phoenix’s final night, creating a poignant narrative of talent, tragedy, and legacy.

1.2 Historical Context of the Viper Room

The Viper Room, a legendary nightclub on Hollywood’s Sunset Strip, was co-founded in 1993 by Johnny Depp, Sal Jenco, and others, quickly becoming a hotspot for celebrities and nightlife enthusiasts.

Known for its exclusive atmosphere and underground vibe, the club was a symbol of Hollywood’s wild side, hosting private events and attracting A-listers;

Its notoriety grew after the tragic death of River Phoenix outside its doors, cementing its place in pop culture history as a location tied to both glamour and tragedy.

The Life and Career of River Phoenix

River Phoenix was a talented actor whose raw intensity and vulnerability left a lasting impact on Hollywood, earning him acclaim and admiration from audiences worldwide.

2.1 Early Life and Rise to Fame

Born on August 23, 1970, River Phoenix grew up in a unconventional household, often moving between countries. His early exposure to acting came through his family, who valued the arts deeply. Phoenix’s talent quickly shone through, leading to his breakout role in Stand by Me at just 15. His performance earned widespread acclaim, propelling him into the spotlight and setting the stage for a promising career in Hollywood.

2.2 Notable Roles and Achievements

River Phoenix’s career was marked by standout performances that showcased his talent and depth as an actor. In Stand by Me, his portrayal of Chris Chambers earned him critical acclaim. His role in Running on Empty brought him an Academy Award nomination, highlighting his ability to convey complex emotions. These roles not only solidified his reputation as a gifted actor but also demonstrated his versatility in handling diverse characters and storylines.

The Tragic Events of October 31, 1993

River Phoenix’s life ended tragically outside the Viper Room, marking a devastating moment in Hollywood history that shocked fans and the entertainment industry worldwide.

3.1 The Night at the Viper Room

The night of October 31, 1993, was a Halloween party at the Viper Room, a club co-founded by Johnny Depp. River Phoenix attended the event, joining a performance by the band P. The evening unfolded with Phoenix interacting with friends and fans, but his behavior became increasingly erratic. Outside the club, he collapsed on the sidewalk, suffering from a fatal overdose. The tragic incident marked the end of a promising career and left an indelible mark on Hollywood’s history, forever linking Phoenix’s legacy to the Viper Room.

3.2 The Circumstances Surrounding River Phoenix’s Death

River Phoenix’s death occurred shortly after he collapsed outside the Viper Room on October 31, 1993. Witnesses reported he was experiencing severe physical distress, including seizures and difficulty breathing. Emergency services were called, but efforts to revive him were unsuccessful. The autopsy revealed that his death was caused by an accidental overdose of heroin and cocaine. The toxicology report confirmed the presence of these substances in his system. The incident shocked fans and the film industry, highlighting the risks of substance abuse and the tragic end to a promising career.

The Viper Room’s Role in Hollywood History

The Viper Room, a symbol of 1990s Hollywood glamour, became a hotspot for celebrities and a cultural icon, shaping the era’s entertainment landscape with its exclusive reputation.

4.1 The Club’s Founding and Reputation

The Viper Room was founded in 1993 by a group of high-profile celebrities, including Johnny Depp, Sal Jenco, and others. Nestled on the iconic Sunset Strip, it quickly became synonymous with exclusivity and Hollywood glamour. Known for its intimate setting and strict VIP-only policy, the club attracted A-listers and industry insiders, fostering a reputation as a hotspot for private parties and underground performances. Its elusive nature and association with the elite cemented its status as a cultural symbol of 1990s Hollywood nightlife.

4.2 The Viper Room as a Cultural Icon

The Viper Room transcended its role as a nightclub, becoming a cultural icon of 1990s Hollywood. Its association with River Phoenix’s tragic death in 1993 etched it into pop culture history. The club’s exclusive vibe and connection to A-list celebrities made it a symbol of the era’s glamour and excess. Over time, its image has endured, representing both the allure and darker side of Hollywood’s nightlife, solidifying its place in the collective memory of entertainment history.

The Impact of River Phoenix’s Death

River Phoenix’s death sent shockwaves through Hollywood, marking the loss of a rising star. His untimely demise devastated fans and the film industry, leaving a lasting emotional impact.

5.1 On the Film Industry

River Phoenix’s death sent shockwaves through Hollywood, leaving a void in the film industry. His untimely passing halted promising projects and collaborations, showcasing the fragility of talent. Studios and filmmakers faced challenges in casting roles initially intended for him, highlighting his unique presence. The tragedy also sparked reflections on mental health and substance abuse in the industry, prompting discussions about support systems for young actors. Phoenix’s legacy endures as a reminder of unfulfilled potential, influencing how the industry approaches talent development and wellness.

5.2 On His Fans and Legacy

River Phoenix’s death deeply affected his fans, who mourned the loss of a talented actor and advocate for social causes. His legacy endures through his iconic roles and commitment to environmental and animal rights. Fans continue to celebrate his work, ensuring his memory remains vibrant. The Viper Room incident became a cultural touchstone, symbolizing both tragedy and the enduring fascination with his story. His influence inspires new generations, keeping his spirit alive in popular culture and beyond.

The Book’s Contribution to Understanding the Event

Gavin Edwards’ book offers unique insights into River Phoenix’s life and death, providing a well-researched perspective on the events surrounding his tragic final night at the Viper Room.

6.1 Unique Insights and Revelations

Gavin Edwards’ Last Night at the Viper Room provides a meticulously researched account of River Phoenix’s life and death, uncovering new perspectives on his final hours.

The book reveals exclusive interviews and previously undisclosed details, offering a deeper understanding of the circumstances surrounding his tragic demise at the Viper Room.

By examining Phoenix’s rise to fame and struggles with fame, Edwards sheds light on the broader cultural and personal factors that contributed to this devastating event.

6.2 The Author’s Approach and Research

Gavin Edwards employs a meticulous and empathetic approach in Last Night at the Viper Room, blending thorough research with intimate storytelling.

He draws from extensive interviews, archival records, and firsthand accounts to reconstruct River Phoenix’s life and the events at the Viper Room.

Edwards’ dedication to accuracy and sensitivity ensures a balanced portrayal, offering readers a comprehensive understanding of the circumstances and context surrounding Phoenix’s tragic death.

The Cultural Significance of “Last Night at the Viper Room”

The book offers a profound exploration of River Phoenix’s legacy, blending personal tragedy with cultural impact, resonating deeply with fans and historians of Hollywood’s golden era.

7.1 The Book’s Reception and Reviews

Gavin Edwards’ Last Night at the Viper Room has garnered widespread acclaim for its meticulous research and emotional depth. Critics praise its balanced portrayal of River Phoenix’s life, blending personal anecdotes with cultural context. Fans and historians alike have applauded the book for its insightful exploration of the Viper Room’s significance and the tragic events of October 31, 1993. The narrative is both a touching tribute to Phoenix and a fascinating delve into Hollywood’s history, making it a compelling read for those intrigued by the intersection of celebrity and tragedy.

7.2 Its Place in Pop Culture History

Last Night at the Viper Room holds a significant place in pop culture history, chronicling a defining moment in Hollywood’s narrative. The Viper Room, once a symbol of ’90s glamour and excess, is vividly portrayed as a backdrop to River Phoenix’s story. The book bridges the gap between celebrity biography and cultural critique, offering a nuanced view of an era that shaped modern entertainment. Its exploration of fame, tragedy, and legacy ensures its relevance in understanding the evolution of pop culture.

The Legacy of River Phoenix and the Viper Room

River Phoenix’s talent and tragic story continue to inspire, while the Viper Room remains a cultural icon, symbolizing Hollywood’s glamour and excess. Their intertwined legacies endure, captivating audiences and historians alike.

8.1 Enduring Influence on Entertainment

The Viper Room remains a symbol of Hollywood’s vibrant nightlife, influencing pop culture and entertainment. River Phoenix’s legacy continues to inspire actors, with many, like Leonardo DiCaprio and Johnny Depp, drawing inspiration from his raw talent. The club’s reputation as a hub for A-listers and exclusive events solidifies its place in Hollywood history. Both Phoenix and the Viper Room embody the glamour and tragedy of Tinseltown, leaving an indelible mark on the entertainment industry’s collective memory and cultural landscape.

8.2 The Ongoing Fascination with the Story

The story of River Phoenix and the Viper Room continues to captivate audiences, blending tragedy, glamour, and intrigue. The book Last Night at the Viper Room reignites interest, offering fresh insights into Phoenix’s life and the events of that fateful night. The enduring appeal lies in the intersection of Hollywood’s excess and the poignant loss of a rising star, making it a timeless tale of fame, vulnerability, and the darker side of celebrity culture.

Last Night at the Viper Room serves as a poignant tribute to River Phoenix, capturing the essence of his brief yet brilliant career and the tragic events that unfolded. The book not only preserves his memory but also highlights the enduring influence of the Viper Room as a symbol of Hollywood’s vibrant yet often tumultuous culture. Through its detailed narrative, the book ensures that Phoenix’s legacy endures, offering readers a deeper understanding of his life, death, and the lasting impact of that fateful night.

Continue Reading

bodyweight workout program pdf

Bodyweight workout programs are a popular and accessible way to build strength and fitness without equipment. They offer a variety of exercises that engage the entire body‚ promoting flexibility and muscle endurance. With structured PDF resources available‚ individuals can follow guided plans tailored to their fitness levels‚ ensuring progressive overload and consistent results. These programs are ideal for those seeking convenience and effectiveness in their fitness journey.

What is a Bodyweight Workout Program?

A bodyweight workout program is a structured plan utilizing exercises that rely on an individual’s own weight for resistance. These programs often include exercises like push-ups‚ squats‚ and planks‚ which can be performed anywhere without specialized equipment. PDF resources provide detailed guidance‚ including routines tailored to different fitness levels and goals. They may offer variations for beginners‚ intermediates‚ and advanced individuals‚ ensuring progressive overload to maintain challenge and progress. These programs emphasize proper form and technique‚ making them accessible and effective for improving strength‚ endurance‚ and overall fitness. They are ideal for those seeking convenience and consistency in their training regimen.

Why Bodyweight Training is Effective

Bodyweight training is effective because it engages multiple muscle groups simultaneously‚ enhancing functional strength and coordination. It improves muscle endurance and overall fitness without requiring equipment‚ making it highly accessible. PDF programs often structure workouts to ensure progressive overload‚ gradually increasing difficulty as the individual gains strength. This approach prevents plateaus and promotes continuous improvement. Additionally‚ bodyweight exercises can be modified to suit different fitness levels‚ ensuring they remain challenging and effective for everyone from beginners to advanced trainees. The convenience and versatility of these programs contribute to their popularity and success in achieving fitness goals.

Benefits of a Bodyweight Workout Program

Bodyweight workout programs improve muscle strength‚ endurance‚ and flexibility while being cost-effective and convenient. They enhance overall fitness without requiring equipment‚ making them ideal for all fitness levels.

Convenience and Accessibility

Bodyweight workout programs are incredibly convenient‚ requiring no equipment or specialized space. They can be performed anywhere‚ from home to outdoor settings‚ making them ideal for busy schedules. With minimal setup‚ individuals can quickly start their routine‚ saving time and effort. Additionally‚ bodyweight exercises are accessible to all fitness levels‚ as they rely on the individual’s weight for resistance. This adaptability ensures that anyone can engage in effective workouts without needing a gym membership or expensive equipment. PDF guides further enhance accessibility by providing structured plans that can be followed effortlessly‚ anytime and anywhere.

Cost-Effectiveness

Bodyweight workout programs are highly cost-effective‚ eliminating the need for expensive gym memberships or equipment. By utilizing one’s own body weight as resistance‚ individuals can achieve significant fitness gains without financial strain; PDF guides and online resources further reduce costs‚ offering comprehensive workout plans at little to no expense. This affordability makes bodyweight training accessible to everyone‚ ensuring that financial barriers do not hinder progress toward fitness goals. With minimal investment‚ individuals can enjoy long-term health benefits and a strong‚ capable physique through consistent practice and dedication.

Improving Muscle Endurance and Strength

Bodyweight workout programs excel at enhancing muscle endurance and strength by utilizing the body’s weight as resistance. Through exercises like push-ups‚ squats‚ and planks‚ individuals can progressively increase intensity by modifying angles or reps. Adding resistance bands further boosts strength. A 30-Day Ultimate Calisthenics Plan and programs like Austin Dunham’s BodyWeight BodyBuilder 2.0 highlight the effectiveness of progressive overload‚ essential for muscle growth. Regular practice‚ combined with proper nutrition‚ ensures consistent gains. PDF guides offer structured plans‚ making it easy to track progress and achieve a stronger‚ more enduring physique without costly equipment. Consistency is key to unlocking full potential.

Essential Exercises in a Bodyweight Workout Program

Key exercises include push-ups‚ pull-ups‚ dips‚ squats‚ lunges‚ planks‚ Russian twists‚ and leg raises. Resistance bands can enhance intensity‚ providing a comprehensive workout for strength and endurance.

Upper Body Exercises: Push-Ups‚ Pull-Ups‚ and Dips

Push-ups target the chest‚ shoulders‚ and triceps‚ building upper body strength. Pull-ups focus on the back and arms‚ improving grip and overall muscle endurance. Dips work the triceps and chest‚ enhancing definition. These exercises can be modified with variations like wide-grip pull-ups or decline push-ups to increase difficulty. Incorporating resistance bands adds extra challenge‚ helping to progress your workouts. PDF guides often include detailed routines combining these exercises for a balanced upper body workout‚ ensuring you can train effectively at home or in a gym setting.

Lower Body Exercises: Squats‚ Lunges‚ and Glutes Bridges

Squats are a fundamental lower body exercise that targets the quadriceps‚ hamstrings‚ and glutes‚ improving overall leg strength and stability. Lunges focus on individual leg development‚ enhancing balance and muscle symmetry. Glute bridges isolate the glutes‚ helping to build a stronger‚ more defined posterior. Variations like Sumo squats or deficit lunges can add challenge. PDF guides often include these exercises in structured routines‚ allowing for progressive overload and ensuring a well-rounded lower body workout. These exercises are versatile and effective for building strength and muscle endurance at home or in the gym.

Core Exercises: Planks‚ Russian Twists‚ and Leg Raises

Planks are a cornerstone of core training‚ engaging the abdominals‚ obliques‚ and lower back muscles to improve stability and posture. Russian twists target the obliques‚ enhancing rotational strength and definition. Leg raises focus on the lower abs‚ building a stronger‚ more defined core. These exercises can be modified to suit different fitness levels‚ with variations like weighted planks or side plank leg lifts. Bodyweight workout PDFs often include these core exercises in routines‚ emphasizing proper form and progressive difficulty to maximize results and overall core strength.

Creating a Bodyweight Workout Program

Creating a bodyweight workout program involves setting clear goals‚ assessing fitness levels‚ and structuring routines around upper‚ lower‚ and core exercises. Incorporate variations‚ resistance bands‚ and progressive overload to ensure continued growth. Schedule workouts‚ track progress‚ and adapt as needed for optimal results and sustained engagement. Bodyweight workout PDFs often provide structured plans‚ ensuring a balanced and effective approach to building strength and endurance without equipment.

Structuring a Weekly Workout Plan

A well-structured weekly workout plan is essential for consistency and progress. Start by splitting your week into upper body‚ lower body‚ and core-focused days. Include active recovery days to promote rest and flexibility. For example‚ dedicate three days to strength training and two to mobility or cardio. Adjust the routine based on your fitness level and goals‚ ensuring a balance between intensity and recovery. Track your progress and modify the plan as needed. Many bodyweight workout PDFs offer pre-designed schedules‚ making it easier to stay organized and motivated throughout your fitness journey.

Tailoring the Program to Different Fitness Levels

Tailoring the Program to Different Fitness Levels

Customizing a bodyweight workout program ensures it suits individual fitness levels. Beginners can start with modified exercises like knee push-ups or assisted squats‚ while advanced individuals can add resistance bands or single-leg variations. Adjusting reps‚ sets‚ and rest periods further personalizes the routine. Incorporating progressive overload by increasing difficulty gradually helps maintain challenge. For example‚ transitioning from basic squats to pistol squats or adding plyometric movements like jump squats can enhance intensity. This tailored approach ensures continuous progress and keeps workouts engaging for all fitness levels‚ from novice to expert‚ fostering long-term adherence and success. Incorporate these adjustments for a balanced and effective routine.

Incorporating Resistance Bands for Added Challenge

Resistance bands are a versatile tool to enhance bodyweight workouts by adding tension and intensity. They can be used to increase the difficulty of exercises like squats‚ push-ups‚ and pull-ups. For example‚ looping a band around the shoulders during squats or under the feet during push-ups creates additional resistance‚ targeting muscles more effectively. Bands are lightweight and portable‚ making them ideal for travel or home workouts. They also allow for progressive overload by increasing band tension or combining multiple bands. This simple addition elevates the challenge of bodyweight exercises‚ helping to build strength and muscle endurance without heavy equipment.

Nutrition and Recovery for Optimal Results

Nutrition and recovery are crucial for maximizing the benefits of a bodyweight workout program. A balanced diet rich in protein‚ carbohydrates‚ and healthy fats provides the energy and nutrients needed for muscle repair and growth. Proper hydration is also essential to support physical performance and recovery. Adequate sleep and rest days allow the body to rebuild and adapt to the demands of training. Incorporating active recovery techniques‚ such as light cardio or mobility exercises‚ can enhance overall fitness. By prioritizing nutrition and recovery‚ individuals can achieve better results‚ avoid injuries‚ and maintain consistent progress in their bodyweight training journey.

Progressive Overload in Bodyweight Training

Progressive overload is a cornerstone of bodyweight training‚ involving gradual increases in exercise intensity to challenge muscles and promote growth. Techniques include increasing reps‚ modifying exercises (e.g.‚ diamond push-ups)‚ reducing rest periods‚ or incorporating isometric holds. Resistance bands can also be added to amplify difficulty. To ensure continued progress without weights‚ focus on perfect form and controlled movements. Over time‚ this approach builds strength‚ endurance‚ and muscle definition‚ keeping workouts engaging and effective. Proper nutrition and recovery support this process‚ enabling the body to adapt and improve consistently.

Top Bodyweight Workout Program PDF Resources

Several high-quality bodyweight workout program PDFs are available online‚ offering structured plans for all fitness levels. Popular options include the 30-Day Ultimate Calisthenics Workout Plan‚ designed to build strength and mass through progressive exercises. Another notable resource is the BodyWeight BodyBuilder 2.0 Programme by Austin Dunham‚ which focuses on advanced techniques for muscle control and definition. These guides provide detailed routines‚ exercise descriptions‚ and nutritional advice‚ ensuring a comprehensive approach to bodyweight training. They are ideal for those seeking a well-organized and effective path to achieving their fitness goals without gym equipment.

Common Mistakes to Avoid in Bodyweight Training

Avoiding common mistakes is crucial for effective bodyweight training; Many individuals neglect proper warm-ups‚ leading to injuries. Poor form during exercises like push-ups or squats can reduce effectiveness and increase injury risk. Progression is often overlooked‚ with people either advancing too quickly or not at all. Overtraining is another issue‚ as inadequate rest hinders recovery; Additionally‚ neglecting nutrition and recovery undermines results. Finally‚ inconsistency is a major pitfall—regular practice is essential for progress. By addressing these errors‚ individuals can optimize their workouts and achieve their fitness goals safely and efficiently.

Bodyweight workout programs offer a versatile and effective path to achieving fitness goals. By leveraging your own weight as resistance‚ you can build strength‚ endurance‚ and flexibility without equipment. Structured PDF guides provide clear plans‚ helping you stay consistent and avoid common mistakes. Prioritizing proper form‚ progressive overload‚ and recovery ensures sustainable progress. Combined with a balanced diet‚ bodyweight training can transform your physique and overall health. Stay committed‚ celebrate small victories‚ and embrace the journey—your fitness goals are within reach with dedication and the right approach.

Continue Reading

how to use the insta medal mounting card instructions

Insta Medal Mounting Cards are innovative tools designed to organize and display medals neatly, either side-by-side or overlapped. They offer a cost-effective, easy-to-use solution for mounting 4 to 7 full-size medals, ensuring a professional appearance while adhering to uniform regulations. Ideal for military personnel, veterans, and collectors, these cards simplify the mounting process with clear instructions, saving time and fees.

What are Insta Medal Mounting Cards?

Insta Medal Mounting Cards are specially designed tools for organizing and displaying medals in a neat, professional manner. They allow users to mount medals either side-by-side or overlapped, depending on the card’s capacity. These cards are available in different variations, with some accommodating 3-4 medals side-by-side or up to 7 medals when overlapped. They are made to simplify the mounting process, ensuring a polished look while adhering to uniform regulations. The cards are easy to use and come with instructions, making them ideal for military personnel, veterans, and collectors who want to display their medals efficiently and cost-effectively.

Benefits of Using Insta Medal Mounting Cards

Insta Medal Mounting Cards offer several advantages, making them a popular choice for medal organization. They provide a cost-effective solution, eliminating the need for expensive professional mounting services. The cards are easy to use, with clear instructions guiding users through the process. They allow for a professional, polished display of medals, whether mounted side-by-side or overlapped. Additionally, these cards ensure compliance with uniform regulations, making them ideal for military personnel and veterans. Their versatility and simplicity make them a practical option for collectors and event organizers seeking to present medals neatly and efficiently.

Understanding Insta Medal Mounting Card Specifics

Insta Medal Mounting Cards are designed to hold 3-4 medals side-by-side or overlap up to 7, offering flexible display options. Knowing the card’s capacity ensures proper medal arrangement.

Types of Insta Medal Mounting Cards

Insta Medal Mounting Cards come in various designs to accommodate different medal quantities and display preferences. They are categorized by their capacity, ranging from cards that mount 3-4 full-size medals side-by-side to those that allow overlapping up to 7 medals. Some cards are specifically designed for military medals, adhering to uniform regulations, while others cater to event organizers or collectors. Additionally, there are cards with optional quickmount accessories for thin ribbons or devices. Each type ensures a professional and organized display, making it easy to present medals neatly and securely.

Capacity and Design Variations

Insta Medal Mounting Cards are available in multiple capacities, accommodating 3 to 7 full-size medals. Some cards are designed for side-by-side mounting, while others allow for overlapping medals to save space. The cards also feature design variations, such as pre-scored lines for precise ribbon placement and optional quickmount accessories for thin ribbons or devices. Military-specific designs ensure compliance with uniform regulations, offering a professional finish. These variations cater to different needs, whether for military, athletic, or commemorative medals, ensuring a neat and organized display. Their versatility makes them ideal for both individual and bulk medal mounting projects.

How to Choose the Right Card for Your Medals

Selecting the right Insta Medal Mounting Card involves considering the number of medals, their size, and the desired display style. Cards are available for 3 to 7 medals, with options for side-by-side or overlapped arrangements. For military medals, ensure the card meets uniform regulations. Consider the occasion—military, athletic, or commemorative—and choose a design that fits. Check for features like pre-scored lines for ribbons or quickmount accessories for thin ribbons or devices. Matching the card to your medal quantity and style ensures a polished, professional look. Always review product descriptions to confirm compatibility with your needs.

Preparing Your Medals for Mounting

Gather medals, mounting card, scissors, and double-sided tape. Weave ribbons together for overlapping and prepare medal backs for secure attachment to the card. Ensure all materials are ready.

Gathering Necessary Materials

To begin, collect essential items like Insta Medal Mounting Cards, medals, scissors, double-sided mounting tape, and optional quick-mount ribbons. These tools ensure a smooth, precise mounting process. Verify each medal is compatible with the card’s capacity, whether for side-by-side or overlapping arrangements. Having all materials ready helps maintain efficiency and avoids delays. For military medals, ensure clutchbacks are securely attached. If using quick-mounts, they should match your medal devices. Proper preparation guarantees professional results and adherence to uniform regulations.

Preparation Steps for Your Medals

Before mounting, ensure your medals are clean and dry. Attach clutchbacks securely if not already fixed. If using quick-mount ribbons, align them with the medal devices. For overlapping, weave the ribbons together neatly. Place double-sided mounting tape on the back of the mounting bar, then carefully attach the prepared medals. Ensure ribbons are evenly spaced and smooth; Allow the adhesive to set for a secure hold. Proper preparation ensures a professional finish and prevents adjustments later. This step is crucial for achieving a polished, uniform appearance for military, event, or collector medals.

Step-by-Step Guide to Mounting Your Medals

Mounting your medals is straightforward with Insta Medal Mounting Cards. Begin by aligning your medals side-by-side or overlapping them as desired. Secure each medal to the card using the provided adhesive, ensuring they are evenly spaced and level. Follow the included instructions to achieve a professional finish. This system allows you to save on mounting fees while creating a polished display that meets uniform regulations.

Aligning and Positioning Your Medals

Proper alignment is crucial for a polished display. Start by placing your medals on the Insta Medal Mounting Card, ensuring they are evenly spaced and level. For side-by-side mounting, align the edges of the medals neatly. If overlapping, position the ribbons to cascade smoothly, leaving enough space for a professional appearance. Use the card’s built-in guides to achieve precise placement. For 3-4 medals, maintain symmetry, while 5-7 medals may require slight adjustments for even distribution. Handle medals by the edges to avoid fingerprints and check alignment from multiple angles before securing them.

Securing Medals to the Mounting Card

To secure your medals effectively, start by ensuring they are properly aligned and positioned on the Insta Medal Mounting Card. Once satisfied with their placement, apply a small piece of double-sided mounting tape to the back of each medal or to the mounting bar provided. Gently press the medals onto the card, ensuring they adhere firmly. For overlapping medals, apply the tape strategically to avoid visibility. Use a gentle touch to avoid damaging the medals or the card. This method ensures a secure and professional-looking display, whether you’re mounting 3-4 medals side by side or overlapping up to 7 for a polished finish.

Overlapping Medals for a Professional Look

Overlapping medals is a popular method to achieve a polished and compact display. Start by arranging your medals in the desired order, typically from highest to lowest precedence. Gently weave the ribbons together, ensuring they lie flat and evenly. Secure each medal with double-sided tape or a mounting bar, beginning with the first medal and working your way up. For a seamless look, overlap each subsequent medal slightly, aligning the edges carefully. This technique is especially effective when displaying multiple medals, allowing up to 7 to fit neatly on a single Insta Medal Mounting Card while maintaining a professional appearance.

Finishing Touches and Presentation

Add protective covers to safeguard your medals and enhance their display. Conduct a final inspection to ensure all medals are securely fastened and evenly aligned. Make any necessary adjustments for a polished look, and consider framing or casing your mounted medals for a professional presentation.

Adding Protective Covers

Protective covers are essential for preserving your mounted medals and ensuring a polished presentation. Acrylic or glass covers can be placed over the mounted medals to prevent dust, moisture, and wear. For added security, apply a thin layer of double-sided mounting tape to the back of the cover before placing it over the medals. This step ensures the cover stays firmly in place. Additionally, consider framing or casing your mounted medals for long-term preservation and professional display. Properly sealing your work protects your medals and enhances their visual appeal.

Final Inspection and Adjustments

After mounting your medals, perform a thorough inspection to ensure everything is aligned and secure. Check the positioning of each medal and ribbon to confirm they meet uniform regulations or your desired aesthetic. Adjust any misaligned medals by gently repositioning them while the adhesive is still removable. Verify that all medals are firmly attached and that no ribbons are wrinkled or creased. If necessary, use a soft cloth to smooth out any imperfections. This final step ensures your medals look sharp and professional, making the mounting process complete and visually impressive.

Tips for Different Users

Military personnel and veterans should ensure medals align with uniform regulations, while collectors and event organizers can use cards to create visually appealing displays for any occasion.

For Military Personnel and Veterans

Insta Medal Mounting Cards are ideal for military personnel and veterans, offering a straightforward way to display medals professionally. Ensure compliance with uniform regulations by using clutchbacks and proper ribbon alignment. The cards allow for easy side-by-side or overlapped mounting, accommodating 4 to 7 medals. Follow the included instructions to achieve a polished look that meets military standards. This cost-effective solution saves on professional mounting fees while maintaining a sharp, official appearance for uniforms, ceremonies, or shadow boxes.

For Event Organizers and Collectors

Insta Medal Mounting Cards are a practical solution for event organizers and collectors, offering an efficient way to mount and display multiple medals. Organizers can use these cards to streamline medal preparation for large events, ensuring a professional presentation. Collectors benefit from the ability to neatly arrange and preserve their medals, whether displayed or stored. The cards support side-by-side or overlapped mounting, accommodating up to 7 medals, and come with easy-to-follow instructions. This makes them ideal for creating custom displays or themed collections while maintaining a polished and organized appearance.

Insta Medal Mounting Cards provide a convenient and professional way to display medals, perfect for military personnel, collectors, and event organizers. With easy-to-follow instructions, these cards allow users to mount medals side-by-side or overlapped, accommodating up to 7 medals. They save time and costs compared to traditional mounting services. The cards are versatile, ensuring compliance with uniform regulations while offering a polished presentation. Whether for preserving memories or organizing events, Insta Medal Mounting Cards are a reliable and efficient solution for anyone looking to showcase their achievements with style and precision.

Continue Reading

listado de precios de la aduana de cuba pdf

The official Customs Price List of Cuba is a crucial document published by Cuban authorities, detailing the reference values and pricing for imported goods. It aids in determining customs value, ensuring compliance with regulations and accurate tax calculations. This guide outlines import limits, exemptions, and procedures for bringing goods into Cuba, helping individuals and businesses navigate the customs process efficiently.

1.1 Overview of the Official Document

The Listado de Precios de la Aduana de Cuba PDF is an official document published by Cuban customs authorities. It provides detailed reference prices and valuation methods for imported goods, ensuring transparency in customs procedures. The document is regularly updated, with the 2025 version incorporating new regulations and tariff changes. It serves as a essential guide for individuals and businesses to understand import duties, exemptions, and compliance requirements, facilitating smoother customs clearance processes in Cuba.

1.2 Importance of Understanding Customs Regulations

Understanding Cuba’s customs regulations is crucial for avoiding legal issues and additional costs. The Listado de Precios de la Aduana de Cuba PDF provides clarity on import duties, exemptions, and limits, ensuring compliance. Ignorance of these rules can lead to delays, fines, or confiscation of goods. Staying informed helps individuals and businesses navigate the process smoothly, leveraging exemptions like the $50.99 USD tax-free limit for non-commercial imports, while avoiding prohibited or restricted items.

Methods of Valuation in Cuban Customs

Cuban customs uses methods like declaration, invoices, reference values, and weight-value alternatives to determine import values, ensuring accurate tax calculations and regulatory compliance for all goods.

2.1 Declaration of Customs

The declaration of customs is a primary method for determining the value of imported goods in Cuba. It requires precise details about the items, including their description, quantity, and value. The importer or declarant must provide accurate information to ensure compliance with customs regulations. This declaration serves as the foundation for further valuation processes, with supporting documents like invoices or receipts often required to validate the declared information.

2.2 Invoice or Receipt

An invoice or receipt is a critical document for customs valuation in Cuba. It provides detailed information about the imported goods, including descriptions, quantities, and prices. This document serves as proof of the transaction and helps customs officials determine the accurate value of the items. The invoice is particularly useful when the buyer and seller are involved in international transactions, ensuring transparency and compliance with customs regulations. It validates the declared value, preventing discrepancies during the import process.

2.3 Reference Value Determined by Customs

The reference value determined by Cuban customs is a standardized measure used to assess the value of imported goods. This value is established by customs authorities and serves as a benchmark when the declared value is questionable or unavailable. It ensures consistency in valuation and prevents under-declaration or over-declaration of goods. This method is particularly useful for unique or hard-to-value items, providing a fair and transparent basis for calculating duties and taxes.

2.4 Weight-Value Alternative

The weight-value alternative is a method used by Cuban customs to determine the value of certain goods, particularly miscellaneous items. This approach calculates duties based on the item’s weight rather than its declared value. It is commonly applied to products with a value under $50 USD, ensuring a fair and consistent valuation process. This method prevents discrepancies and simplifies the customs clearance process for low-value or diverse shipments;

Exemptions and Limits for Non-Commercial Imports

Cuban customs exempts non-commercial imports up to $50.99 USD from duties. Limits apply to quantities and types of items, ensuring fair importation practices for individuals.

3.1 Tax Exemption for Imports Up to $50.99 USD

Cuba exempts non-commercial imports up to $50.99 USD from customs duties and taxes for all passengers, including Cubans and foreigners. This applies to personal items like clothing, toiletries, and small electronics. The exemption encourages duty-free importation of essentials and minor goods, simplifying customs procedures for travelers. Exceeding this limit requires payment of duties based on the declared value or reference prices listed in the official customs price list.

3.2 Prohibited and Restricted Items

Cuba prohibits the importation of certain goods, including weapons, explosives, drugs, and live animals without special permits. Restricted items include food, medications, and electronics, which require authorization. The customs list specifies limits on quantities and types of goods to ensure compliance with national laws. Importing prohibited items can lead to legal consequences. Travelers must verify the legality of their goods before arrival to avoid confiscation or penalties.

Categories of Products and Their Pricing

The Cuban Customs Price List categorizes products into electronics, appliances, clothing, personal care items, and home goods, with specified pricing to guide importers on applicable tariffs and compliance.

4.1 Electronics and Appliances

The Cuban Customs Price List categorizes electronics and appliances with specific pricing guidelines. Televisions, refrigerators, and computers are subject to reference values and import limits. Duties are calculated based on the declared value, invoice, or customs reference prices. Personal use items like phones and laptops are allowed up to specified quantities, while bulk imports require special permits. This section ensures clarity on tariffs and restrictions for electronic and appliance imports, aiding accurate duty calculations and compliance with regulations.

4.2 Clothing and Personal Care Items

Clothing and personal care items are classified under Cuba’s customs list, with specific pricing and quantity restrictions. Shoes, clothing, and beauty products must be diverse, prohibiting large quantities of identical items. The reference value system applies, and lower-priced items may use the weight-value method. Importers must adhere to limits to avoid commercial classification. Exceeding these limits requires additional documentation, ensuring compliance with Cuba’s customs regulations for personal use imports.

4.3 Home and Hardware Products

Home and hardware items, such as furniture, tools, and construction materials, are subject to Cuba’s customs pricing list. Furniture imports are limited to five items per type if valued under $50, while pricier items are capped at three. Tools like drills and saws are restricted to three units. Paints and cables have specific quantity limits, ensuring imports align with personal use requirements. These rules prevent commercial-level imports, enforcing Cuba’s customs regulations for non-commercial goods.

Recent Updates in Customs Regulations (2025)

Cuban customs regulations for 2025 include updated tariffs, revised import limits for non-commercial goods, and new digital declaration requirements, streamlining processes while enforcing stricter compliance measures for all imports.

5.1 Changes in Import Limits for Non-Commercial Goods

The 2025 updates to Cuba’s customs regulations have introduced revised import limits for non-commercial goods. These changes include stricter quantity restrictions on certain items, such as electronics and household products, to prevent commercial-scale imports. Additionally, the new regulations emphasize diversification in imported goods, discouraging bulk purchases of identical items. The limits now align with the updated reference values in the official Customs Price List, ensuring fair taxation and compliance.

5.2 New Tariffs for Specific Product Categories

The 2025 updates introduced new tariffs for specific product categories, targeting items like refined sunflower oil with increased rates. These changes reflect Cuba’s efforts to align customs regulations with economic needs. Importers must review the updated Customs Price List to ensure compliance, as these tariffs aim to regulate the flow of goods and revenues effectively.

Special Considerations for Specific Products

Certain products, such as electronics, vehicles, and telecommunications equipment, require special attention due to specific import limits and regulations. The official Customs Price List outlines these requirements.

6.1 Importation of Vehicles and Parts

The importation of vehicles and parts is strictly regulated in Cuba. The Customs Price List specifies limits for vehicle parts, allowing up to five pieces per type, provided they are for maintenance. Tires are limited to five for light vehicles and seven for heavy ones. Special permits are required for importing vehicles, with restrictions on motorcycles and electrical bikes. The list also details valuation methods for these items, ensuring compliance with Cuban customs regulations.

6.2 Regulations for Telecommunications Equipment

Cuba’s customs regulations specify rules for importing telecommunications equipment. Up to three devices like modems, routers, and switches are permitted, while mobile phones are limited to five units. Computer components, such as keyboards and mice, are allowed under specific diversity requirements. The weight-value method is applied to diverse telecom items. Special permits may be required for certain equipment, ensuring compliance with Cuban import regulations and promoting controlled technology influx.

6.3 Limits on Furniture and Household Items

Cuba’s customs regulations impose specific limits on furniture and household items. Furniture valued up to $50 USD allows up to five items, while items exceeding this value are limited to three. Baby furniture, such as cribs and strollers, is restricted to three units. Mattresses are permitted only if part of a bed set. These restrictions ensure balanced imports and prevent excessive commercial activity, aligning with Cuba’s import policies for non-commercial goods.

Taxation and Payment Methods

Cuban customs calculate taxes based on the reference value of imported goods. Payments are made in Cuban pesos, ensuring accurate duty calculation and regulatory compliance.

7.1 Calculation of Duties

Duties in Cuba are calculated based on the reference values of imported goods. The customs authority uses the declared value, invoice, or reference prices to determine the taxable amount. For certain items, like miscellaneous goods, a weight-value alternative method is applied. Taxes are paid in Cuban pesos, ensuring compliance with current regulations. This system helps standardize the calculation process, providing clarity for importers.

7.2 Accepted Payment Methods

Payment of duties and taxes in Cuba must be made in Cuban pesos (CUP). The customs authority accepts cash payments primarily, while some locations may allow credit or debit cards under specific conditions. Foreign currency must be exchanged to CUP at authorized exchange centers before payment. This ensures compliance with local financial regulations and facilitates smooth processing of imports.

The Cuban Customs Price List provides essential guidance for imports, ensuring compliance with updated regulations, tariffs, and limits. Adhering to these guidelines facilitates smooth customs processing and avoids penalties.

8.1 Summary of Import Regulations

Cuba’s customs regulations outline specific limits and requirements for importing goods. Non-commercial imports are subject to a $50.99 USD tax exemption, with restrictions on prohibited items. Documentation, such as invoices or declarations, is mandatory for valuation. The customs price list provides reference values to calculate duties accurately. Recent updates include changes in import limits and new tariffs for specific product categories. Understanding these regulations ensures compliance and avoids penalties during customs processing.

8.2 Where to Find the Official PDF List

The official Customs Price List of Cuba is available as a downloadable PDF document on the Cuban government’s official websites. It can be accessed through the Gaceta Oficial de la República de Cuba or the Ministry of Finance and Prices website. Additionally, authorized customs offices and Cuban diplomatic missions provide copies. This document is essential for understanding import regulations and ensuring compliance with current customs rules and pricing guidelines for 2025.

Continue Reading